Baking Bread with Richard Hart
-
-
Autolyse, or the Initial Mix
For the initial mix, or autolyse, you simply combine the flour and the water until there’s no dry flour remaining. You don’t need to beat the dough; just mix it together.
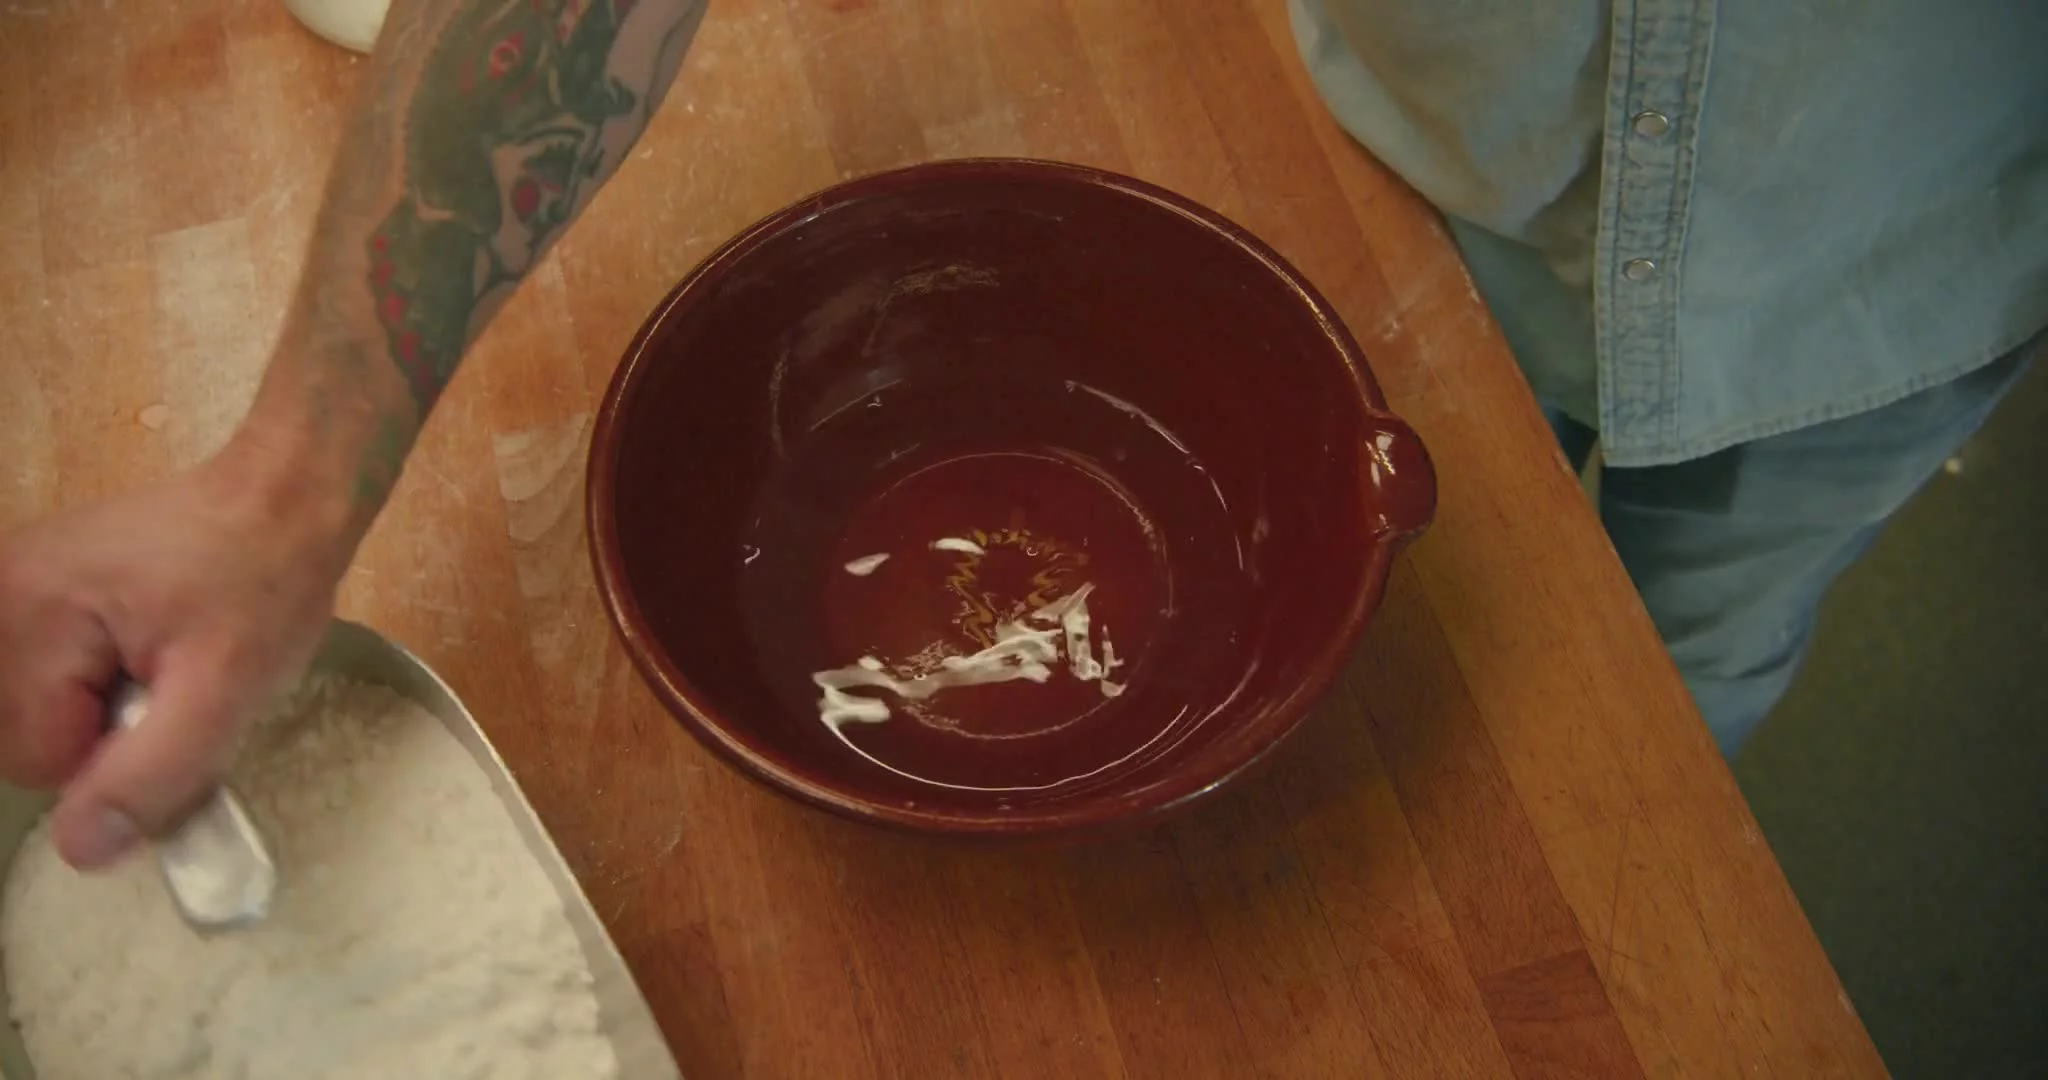
Then, use your flexible plastic bowl scraper to get the excess dough from your hands back into the bowl. Scrape down the insides of the bowl, making sure all the dough is together and your bowl looks clean along the sides.
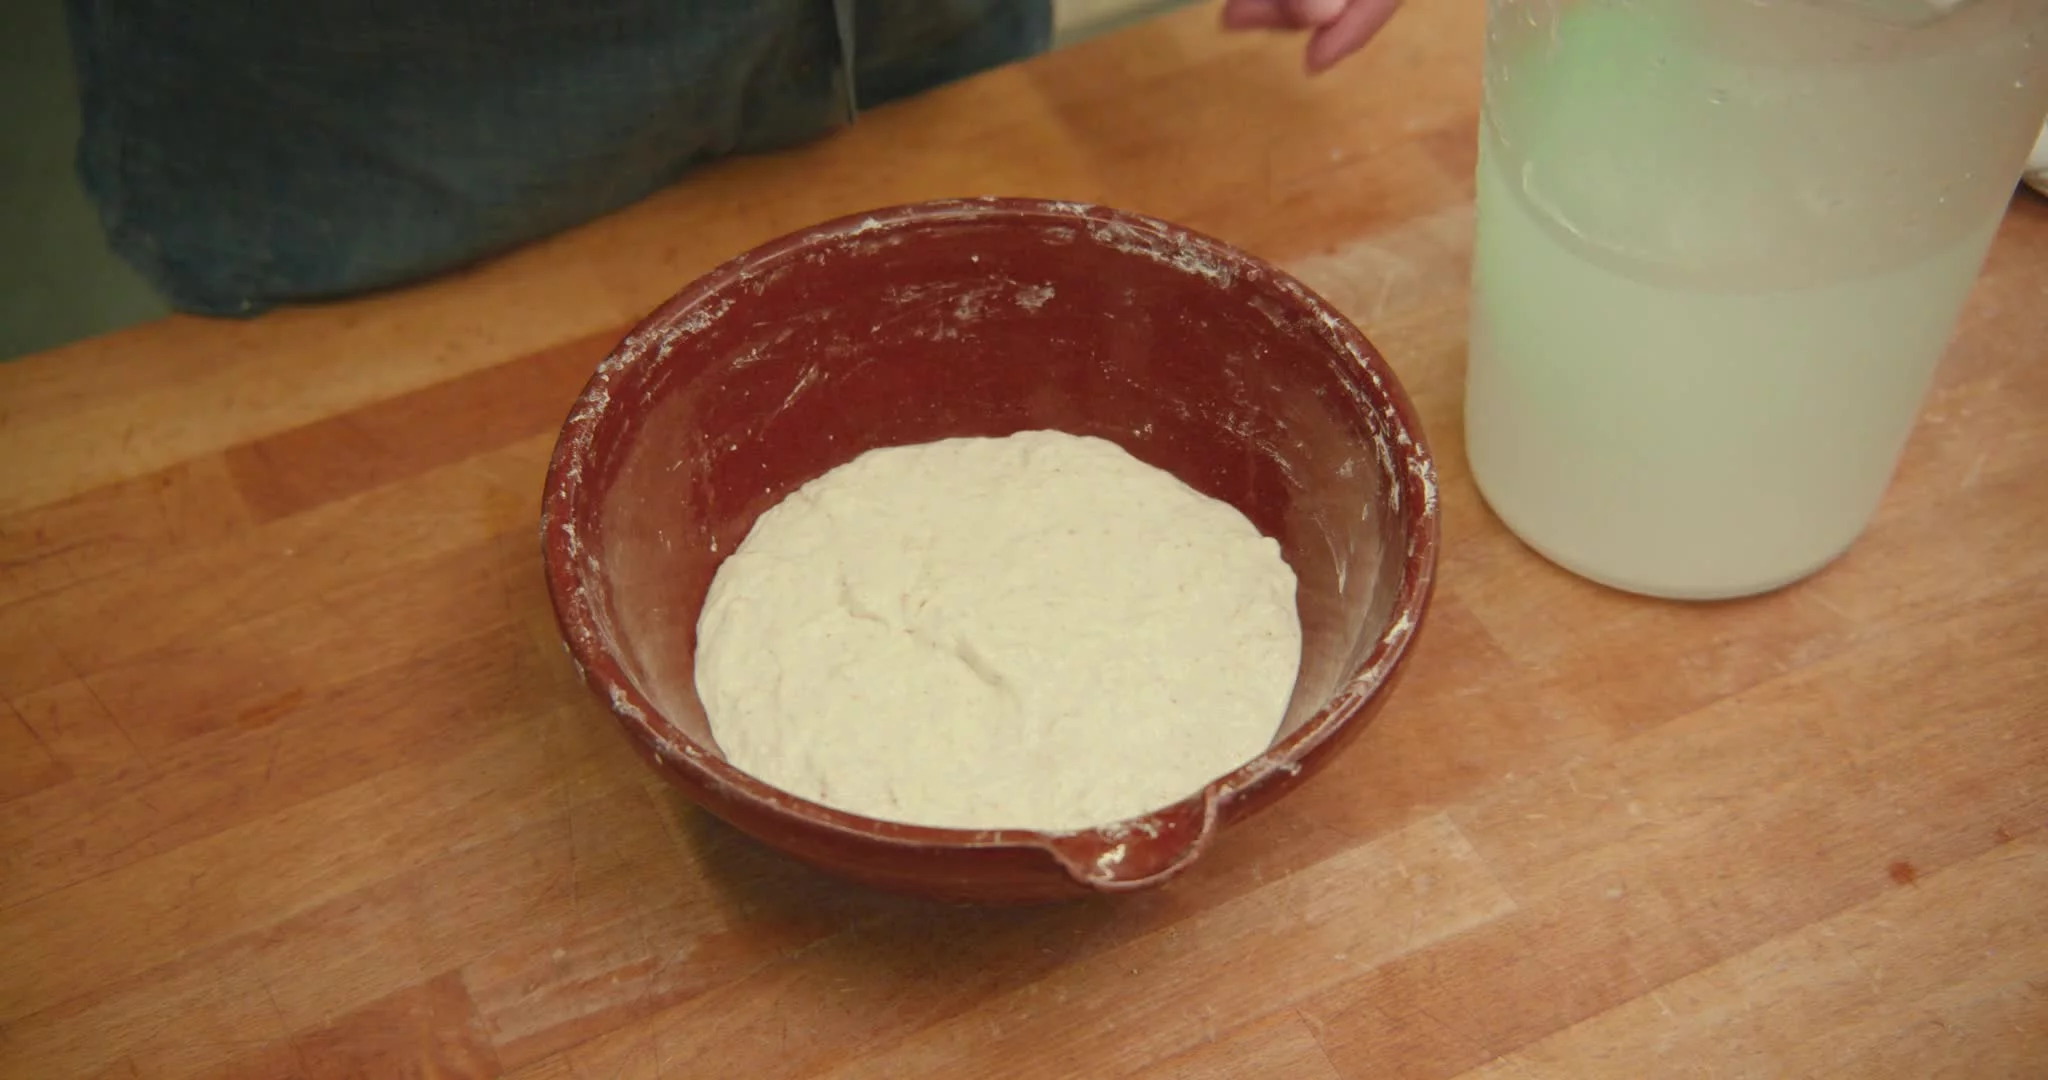
Cover your bowl with a clean tea towel to stop the surface of the dough from getting too dry and forming a skin. Let it rest for at least 20 minutes. This is the stage where the gluten starts to develop, which creates a strong dough without you having to put any effort into mixing or kneading.
You get the benefits of autolyse after 20 minutes, but you can leave your dough for up to a couple of hours to give yourself some flexibility. I typically leave my dough for 45 minutes, because that’s how long it takes for my starter to come alive.
-
Second Hydration/Bassingage + Adding Salt
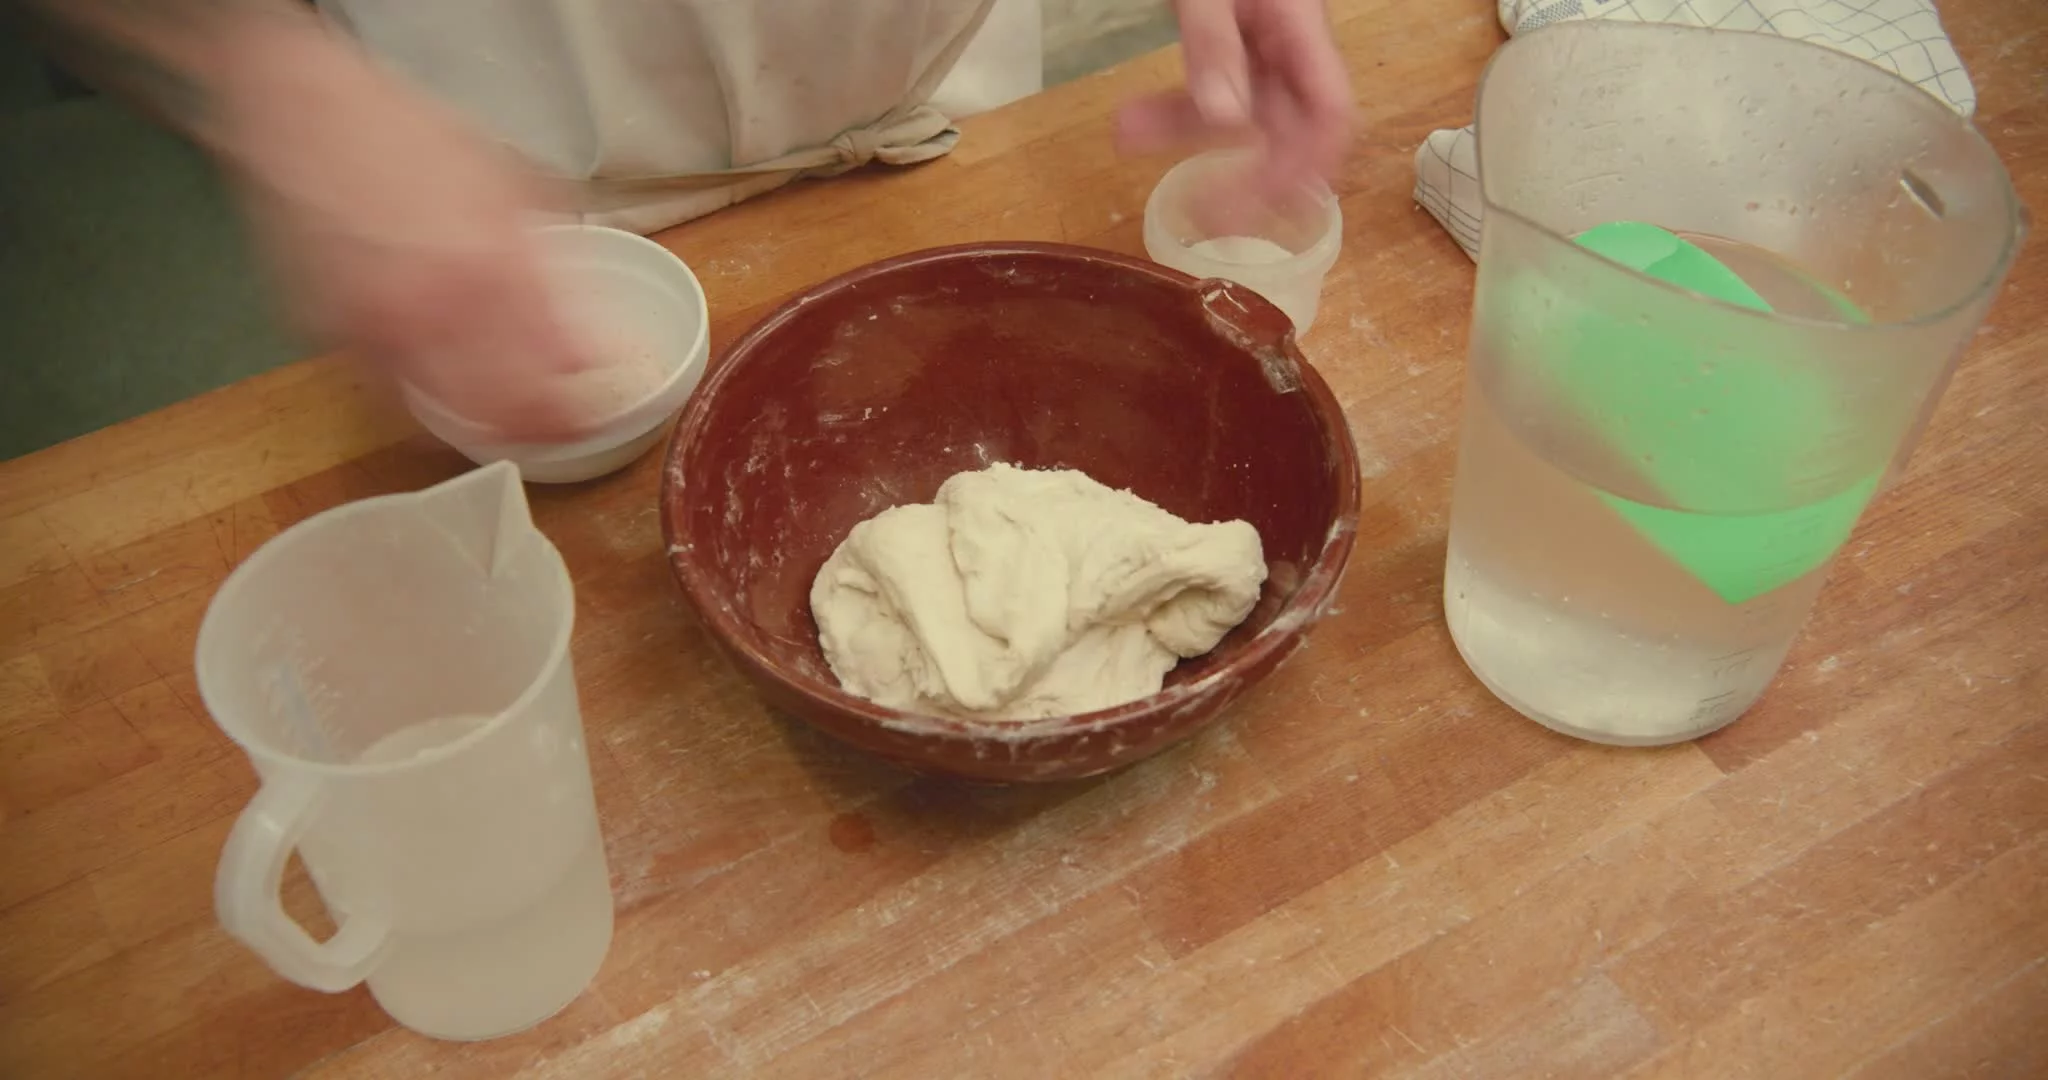
I use a two-step method for hydrating my sourdough loaves.Most of the water goes into the dough at the autolyse stage,but I always hold back a small amount of water that will go in after the starter is mixed in. This step is called bassinage.
Once you have added all the water, add the salt and keep massaging until it’s fully dissolved and absorbed. Salt acts to slow down fermentation, and in large amounts would even kill it, which is why I like to get the fermentation going before adding salt.
I’ve made plenty of salty mistakes in my time, such as not adding any, or adding it twice. Doubling the salt hugely limits fermentation, and no salt at all makes your dough crazy active, fermenting way quicker than usual.
-
Folding
I only ever fold dough that I’m mixing by hand. Due to minimal mixing and no kneading, hand-mixed doughs need to be strengthened. Folding does this by physically helping alongthe gluten formation.
To fold the dough: Keeping the dough in the bowl, gently lift and pull it toward you, and fold it over itself. At first, it will pull very easily and stay where you leave it. Rotate the bowl a quarter turn and fold it again, then give the bowl another quarter turn and fold it again. After four or five turns and folds, it will be as tight as it needs to be and the dough will resist being folded any more. That’s when you know it’s time to stop. I fold the dough twice during the first 1 ½ hours of fermentation (once after 45 minutes and again at 90 minutes).
After that, I like to leave the dough alone to ferment and let all the lovely flavorful gases build up undisturbed. Folding also gives you a good opportunity to check on your dough. As bulk fermentation progresses, you should start to see it come alive, with a few air bubbles.
-
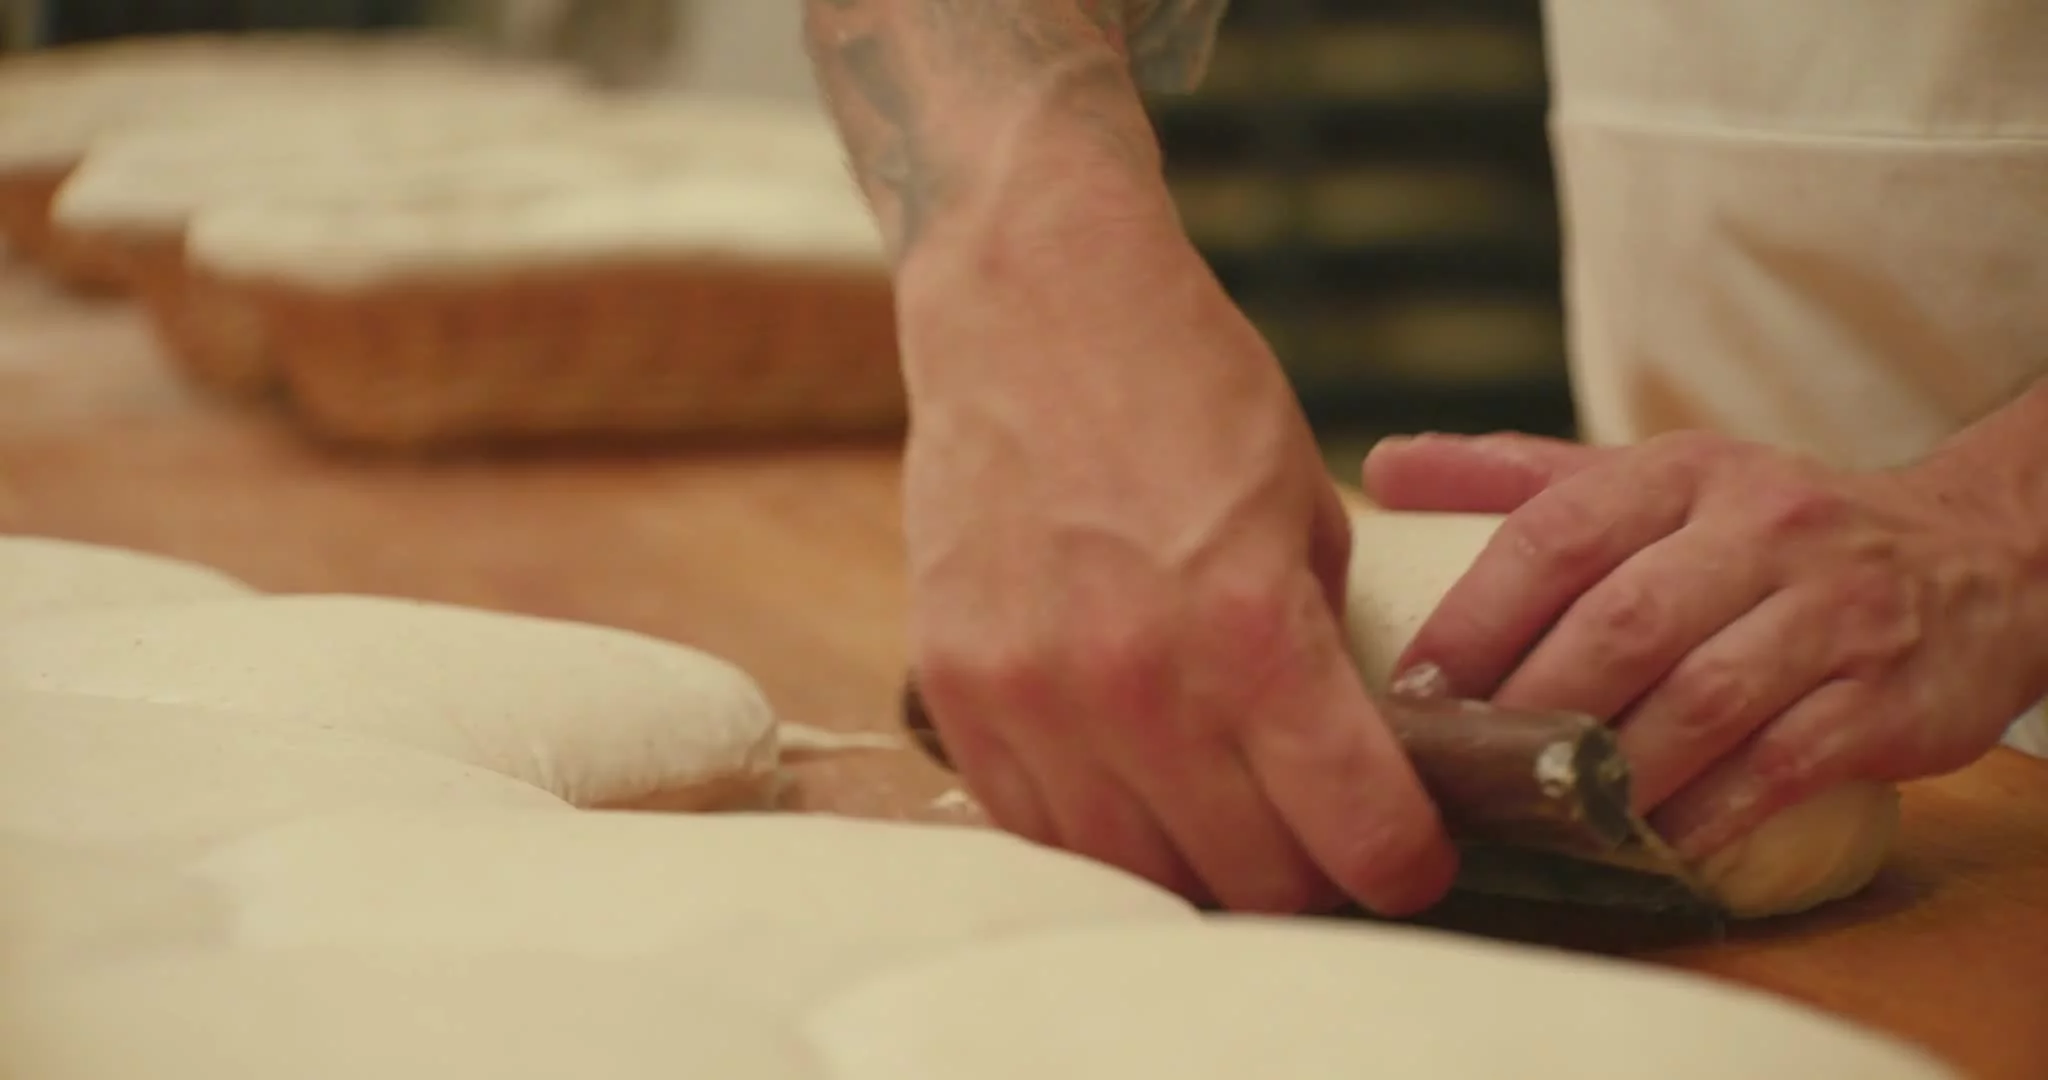
Preshaping
To preshape your dough, gently use your flexible plastic scraper to ease the bread out of the bowl or container in which it was bulk fermented and onto your clean, dry work surface. Treat it tenderly. You don’t want to be rough with it and de-gas it, bursting all the air bubbles in it and sending them out of the dough.
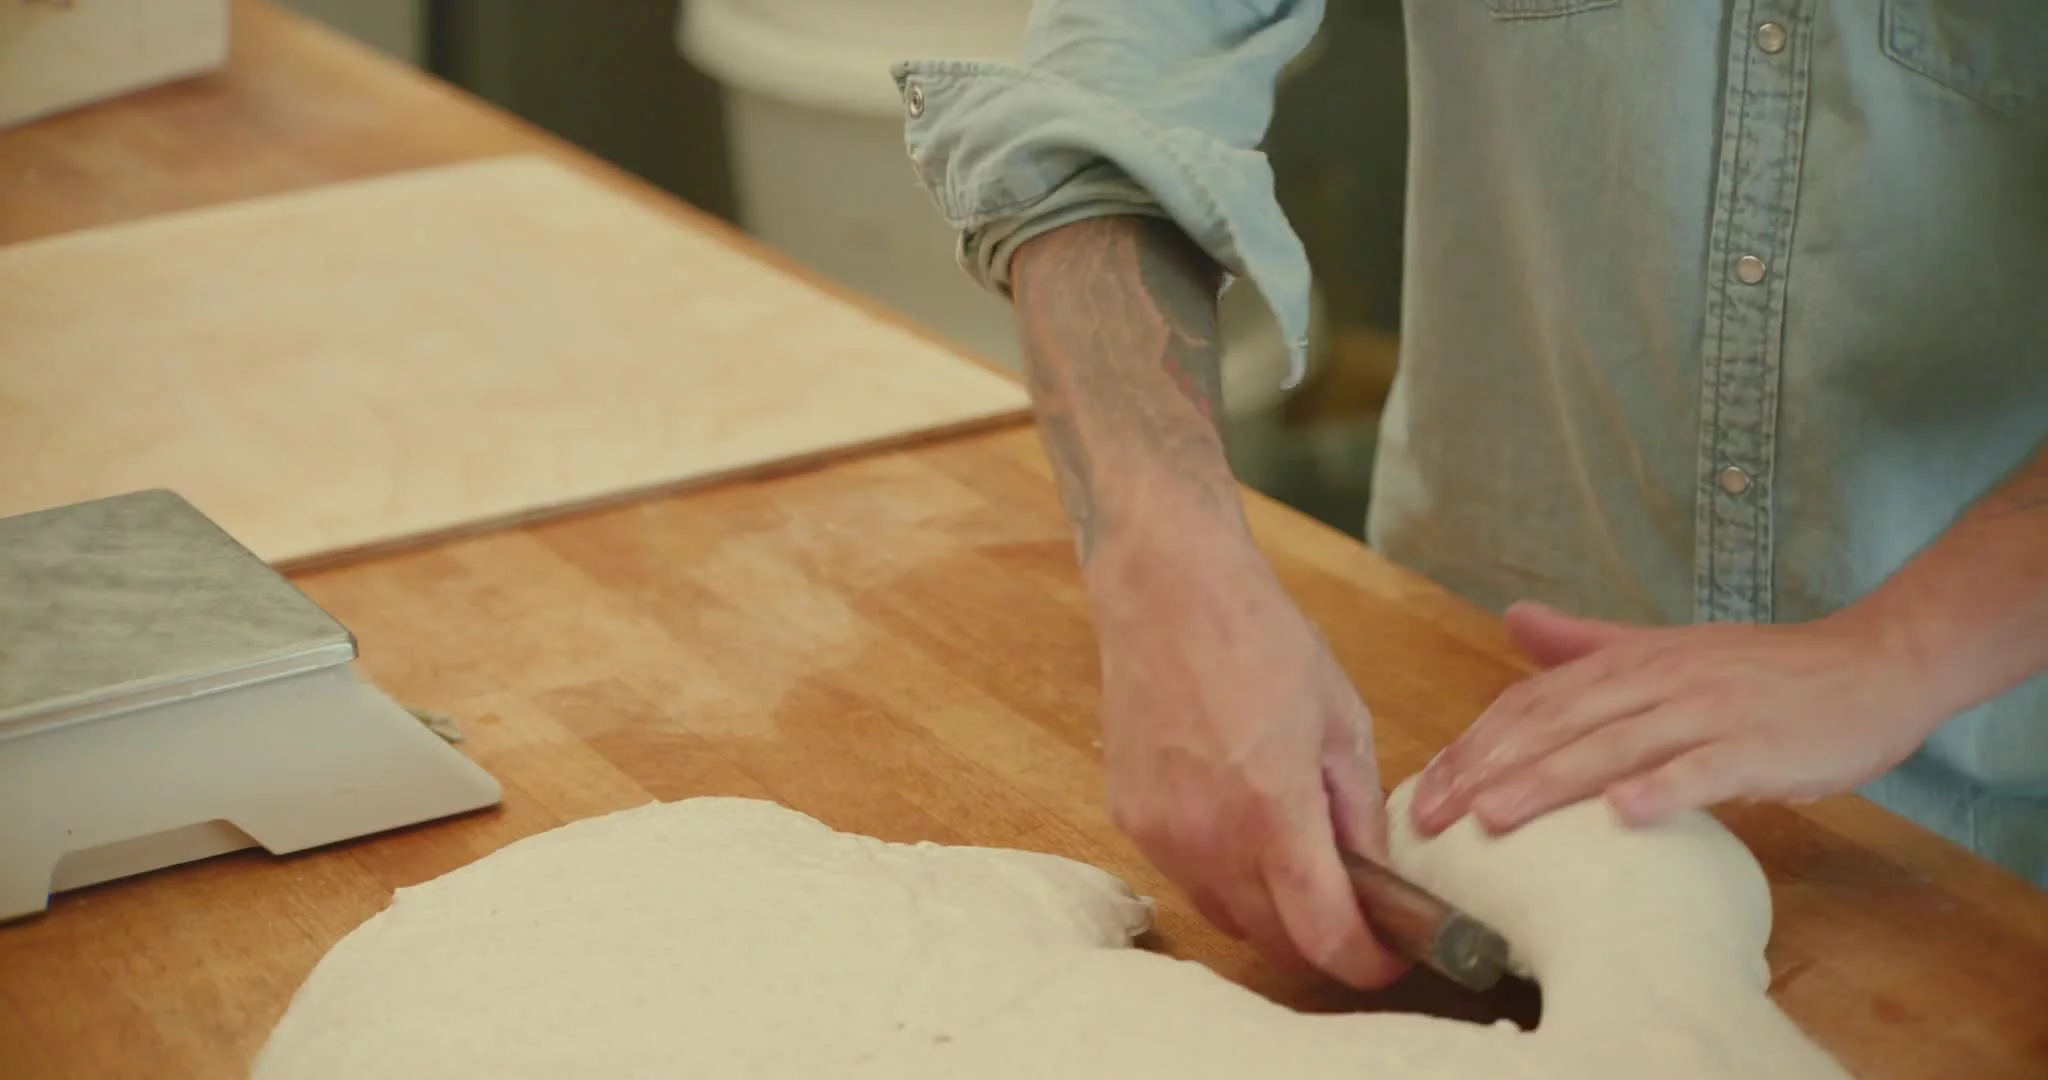
With wet hands and your bench scraper, quickly and decisively divide the dough, using a digital scale if necessary to make sure that the dough is evenly divided. Get one piece directly in front of you. Don’t be afraid to pick it up with your bench scraper and move it to where you need it. Using your hand and bench scraper in unison, work the dough toward you, using your fingers to swiftly tuck the outer edges back under the surface of the loaf, shaping it into a neat round (or oval) with good surface tension. Confident, swift movements are best. There will be some sticking, which is why wet hands are essential. Try not to work the dough too much. You don’t want to let out the beautiful gases you’ve spent all this time creating. It takes a lot of practice, but you’ll know when you have it right — it should look like there’s a nice, tight skin wrapping the ball of dough, and it should sit up a bit proud.
-
Scoring (Lame)
Sometimes you’ll see bread with lots of pretty slashes in the crust, or even whole works of art. This isn’t just decorative; it’s important to score your bread. As the yeasts expand in the oven, the increasing amount of gas needs somewhere to go, an escape route. If you didn’t create a pathway with a score, it would blow up from the sides or the bottom of the loaf. So when you’re scoring, you’re dictating where the bread will split or grow. This way, you’re in charge of its beauty.
Use a lame and a razor blade. Hold the lame delicately in between your thumb and first two fingers. Score the dough quickly and decisively, using the corner of the blade. You want to keep almost flat against the bread, maybe at a 10- to 15-degree angle. You’re just slashing the “skin” open a bit not carving a deep gulley. Keeping the depth even on every score is important, too; remember, you’re creating pathways for the gases to escape, so the more evenly the scores go across the loaf, the more consistent the crumb and texture of the bread will be. This is something you will learn over time, but if your bread is looking slightly underproofed (relatively lifeless and flat) that day, you should score deep, and if it’s looking slightly overproofed (too puffy or marshmallowy), you should score shallow.
-
Scoring (Scissors)
Sometimes you’ll see bread with lots of pretty slashes in the crust, or even whole works of art. This isn’t just decorative; it’s important to score your bread. As the yeasts expand in the oven, the increasing amount of gas needs somewhere to go, an escape route. If you didn’t create a pathway with a score, it would blow up from the sides or the bottom of the loaf. So when you’re scoring, you’re dictating where the bread will split or grow. This way, you’re in charge of its beauty.
For breads with a lot of grain on top, I use scissors. I cut 6 to 8 little snips (1 inch / 2 to 3cm deep) through the center of the loaf, holding the scissors nearly flat to the surface of the bread, which gives it a mohawk effect.
-
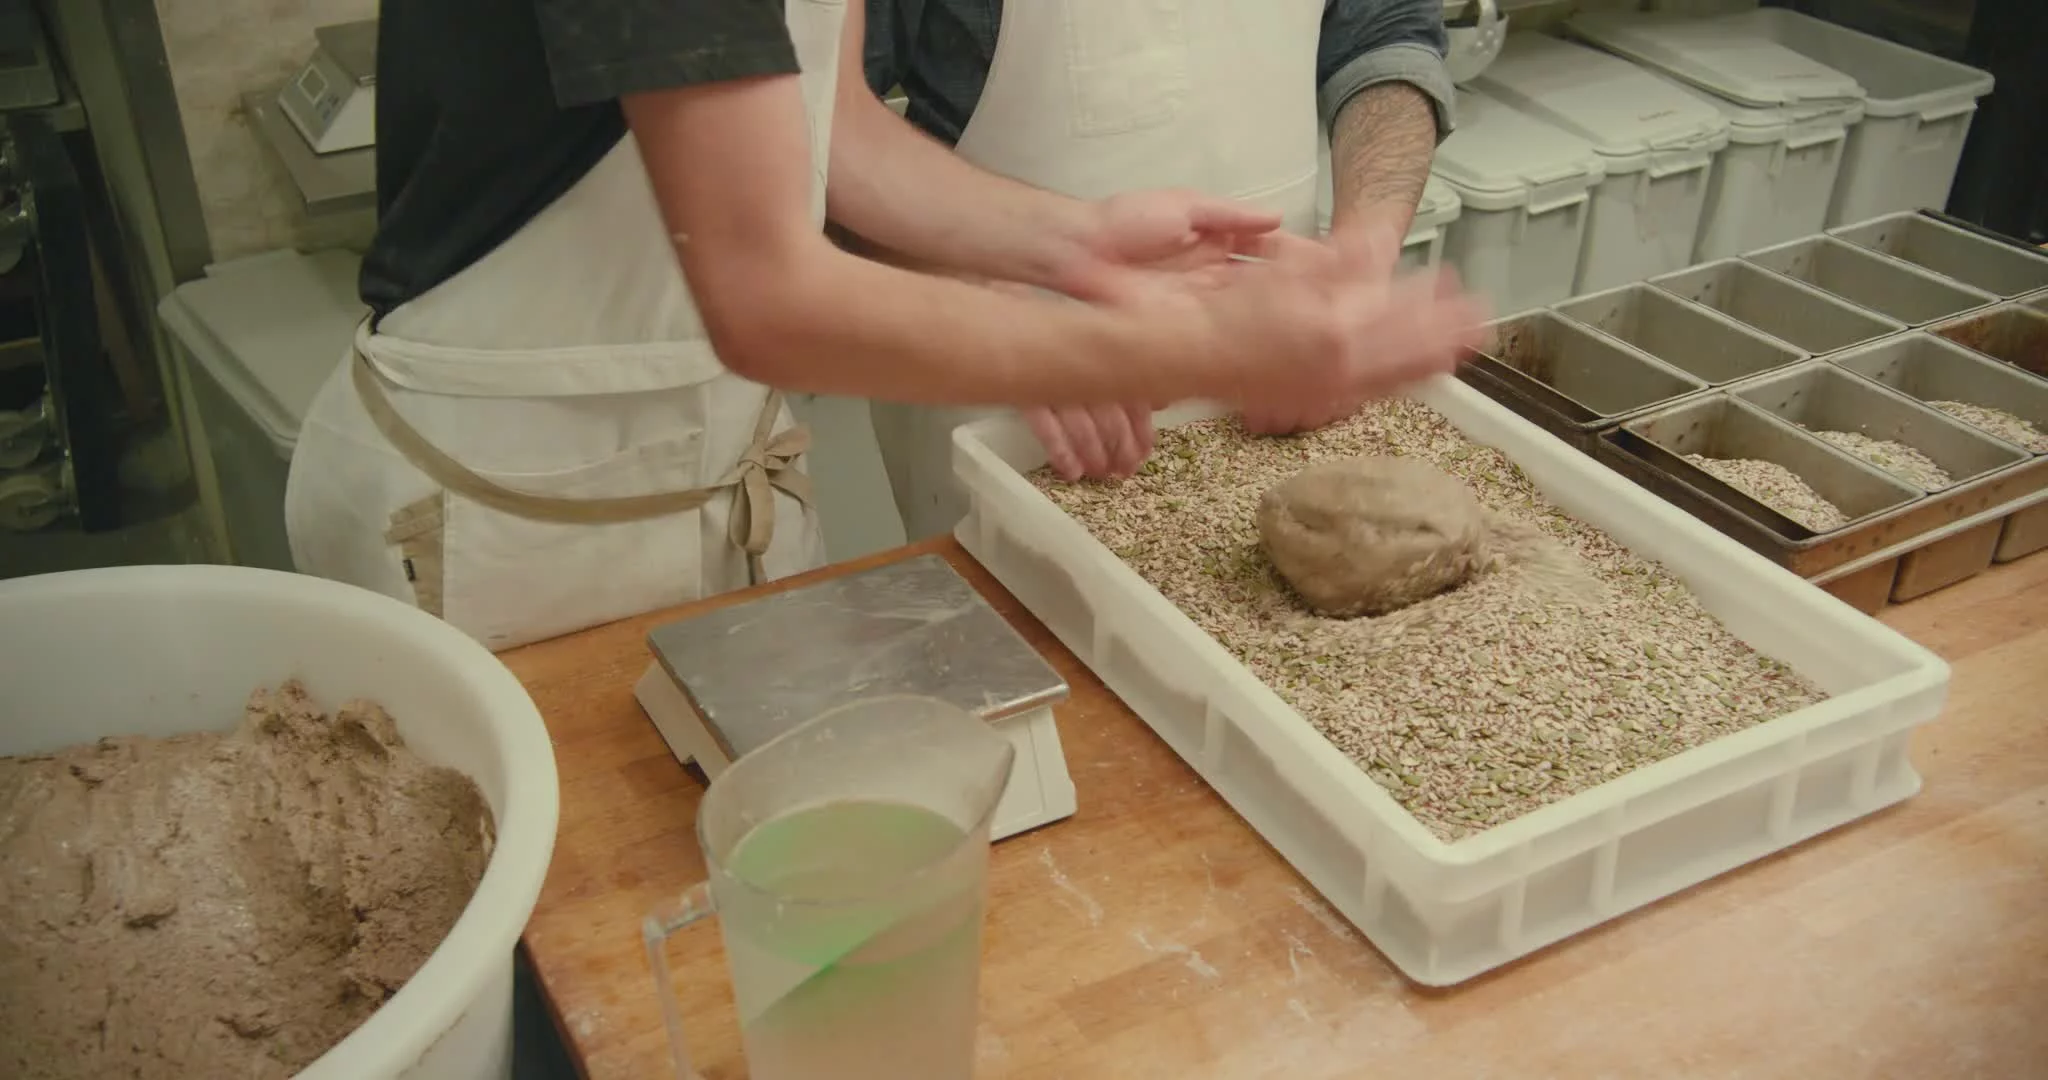
Super Seed Rye Bread - Shape the Dough
Wet your hands, loosen the dough from the bowl with your scraper, and, as if you are shaping clay, squidge the dough together into one mass. Use both hands to shape the dough into an oblong that’s more or less the shape of the loaf pan but slightly less wide. This dough is easy to manipulate and very forgiving, so don’t worry if you need to mess around with it a bit to get it into the shape.
On a wide plate, combine the additional handfuls of sunflower, flax, sesame, and pumpkin seeds and roll the loaf in the seeds so that it is well coated. Gently set the loaf into the buttered pan and take its temperature, adjusting it as necessary by setting the pan in a bowl of hot, warm, or cool water to bring it to about 82°F / 28°C.
-
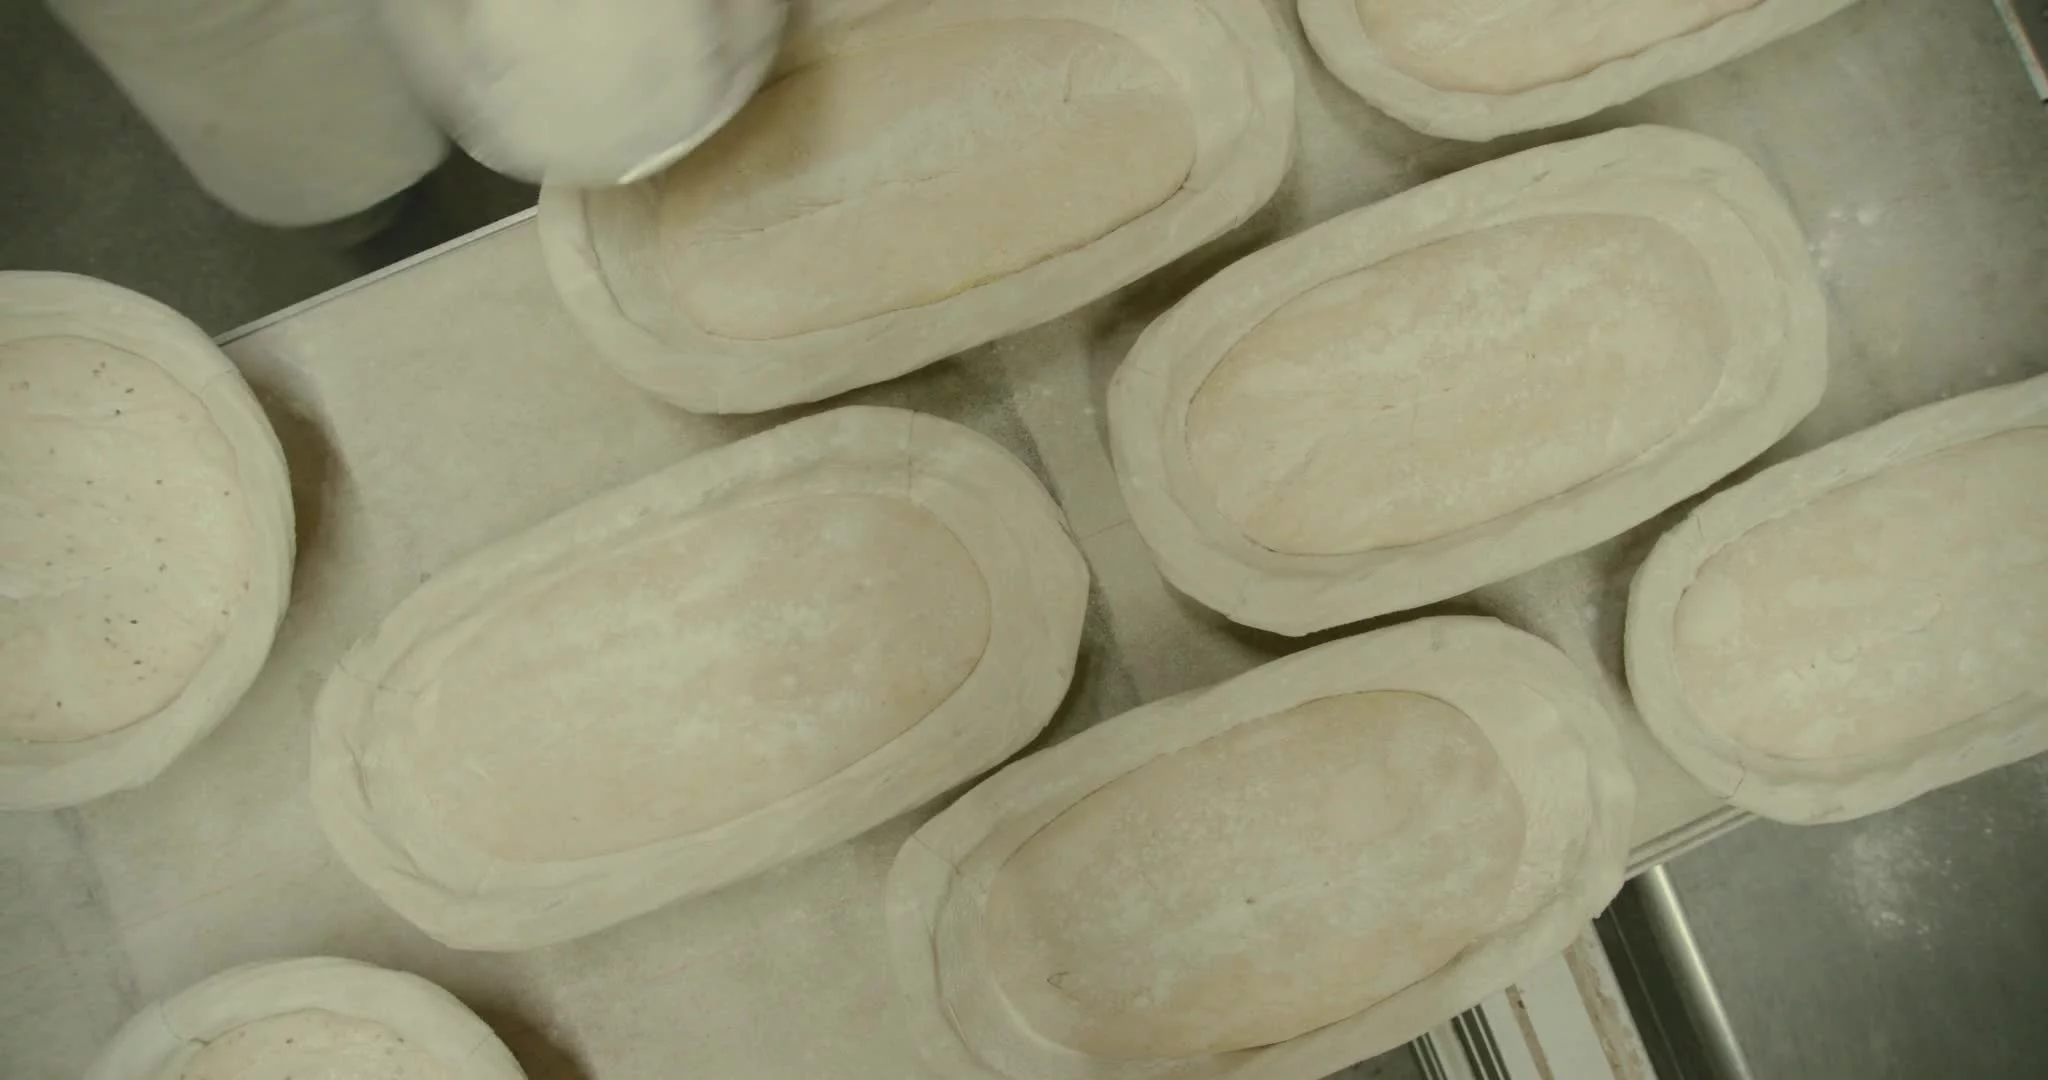
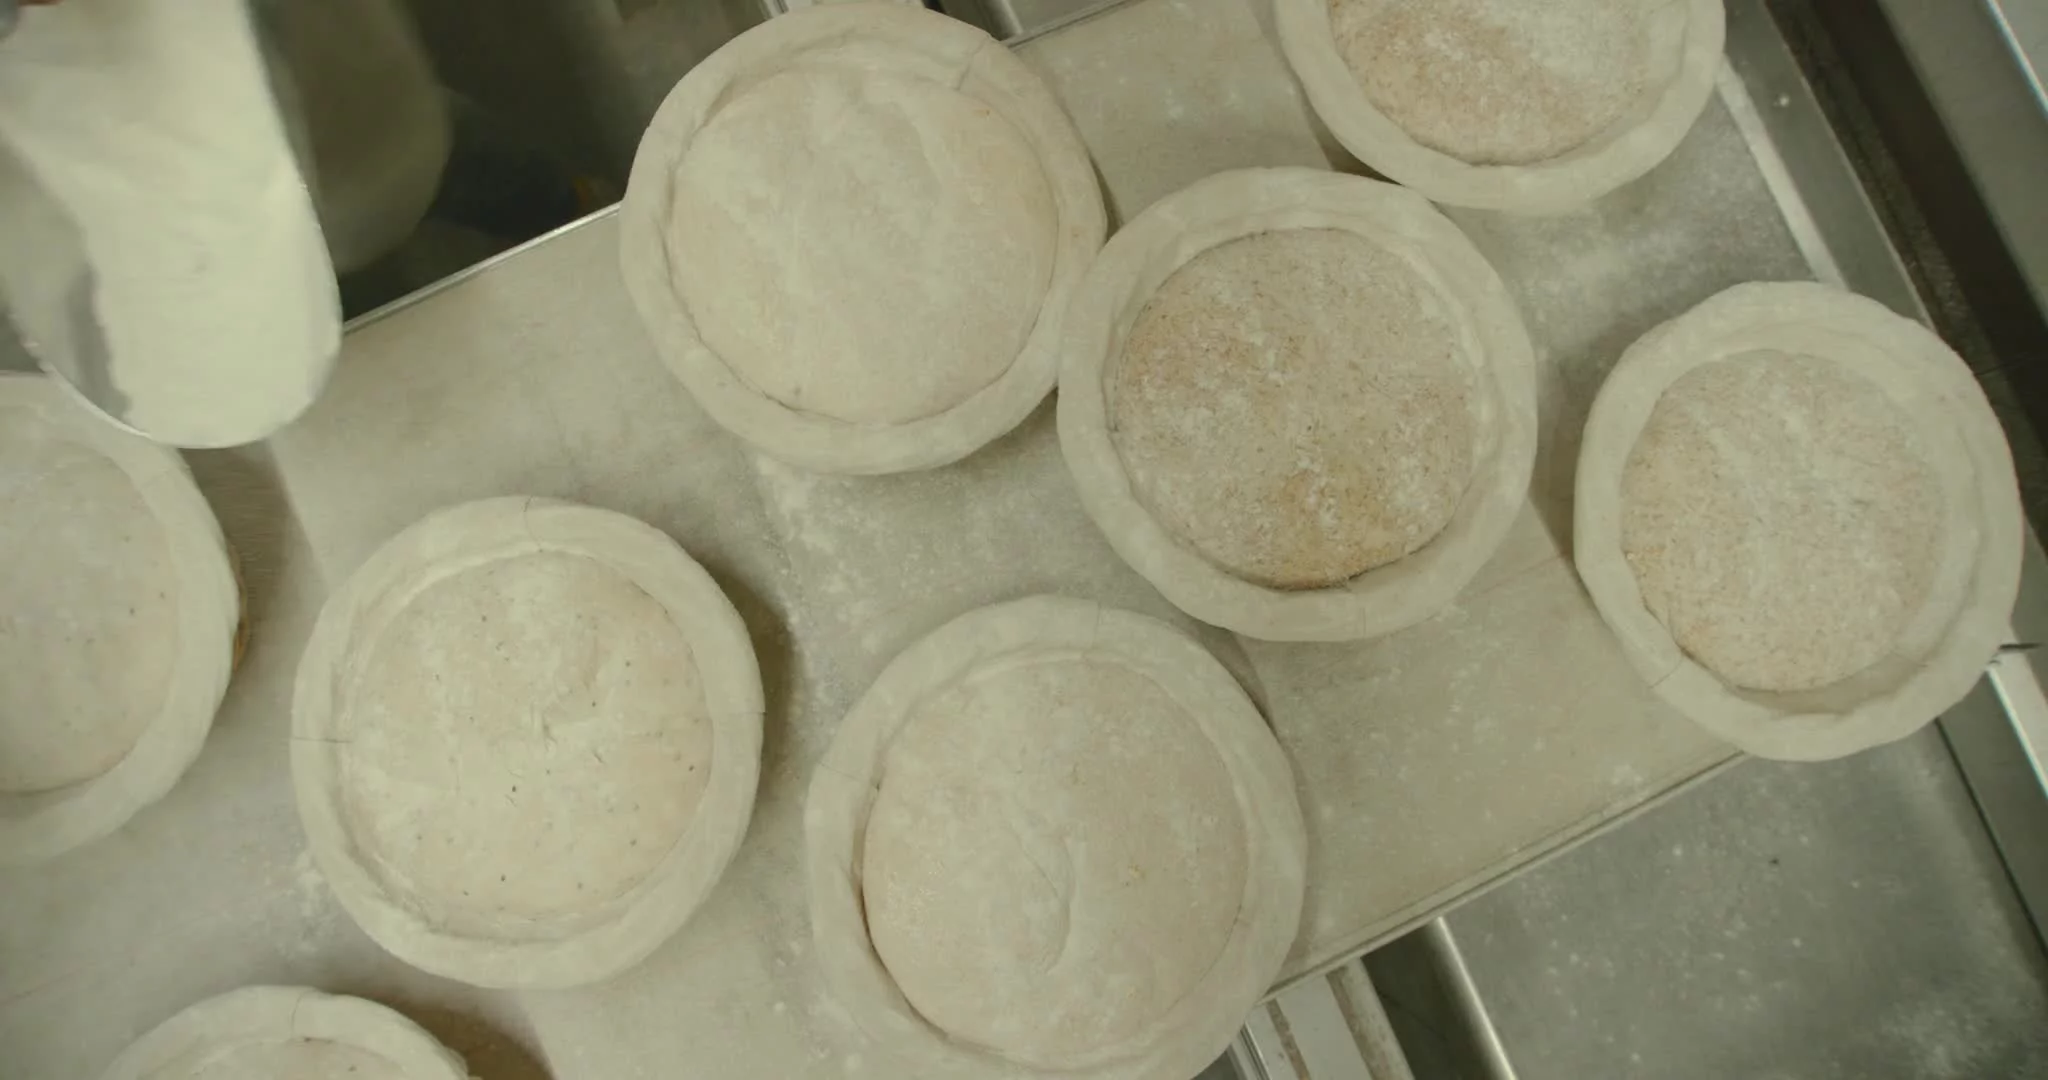
City Loaf Master Recipe - Divide and Preshape
By now, the dough has had 4 hours of bulk fermentation, and if it has been kept at a nice consistent temperature and the room is comfortably warm, it will be well fermented. If you discern that it’s not quite there yet — not too bouncy, no visible bubbling, kind of slack — give it another 30 to 60 minutes.
You might be used to flouring the work surface before putting your dough onto it, but trust me, you don’t need to for this style of bread. You actually want the bottom of the dough to stick to the surface, which will help create tension. Gently use your plastic scraper to ease the bread out of the bowl and onto your work surface. Treat it tenderly. You don’t want to de-gas it. Wet your hands to keep them from sticking to the top of the dough. Use your bench scraper to quickly and firmly divide the dough in two. Get one piece directly in front of you. Don’t be afraid to pick it up with your bench scraper and move it to where you need it.
Using your hand and bench scraper in unison, work the dough toward you, using your fingers to swiftly tuck the outer edges of the ball under the surface of the loaf, shaping it into a neat round with good surface tension. Confident, swift movements are best. There will be some sticking, which is why wet hands are essential. Try not to work the dough too much. You don’t want to let out the beautiful gases you’ve spent all this time creating. It takes a lot of practice, but you’ll know when you have it right—it will come together and have a nice tight surface. Repeat with the other piece of dough.
-
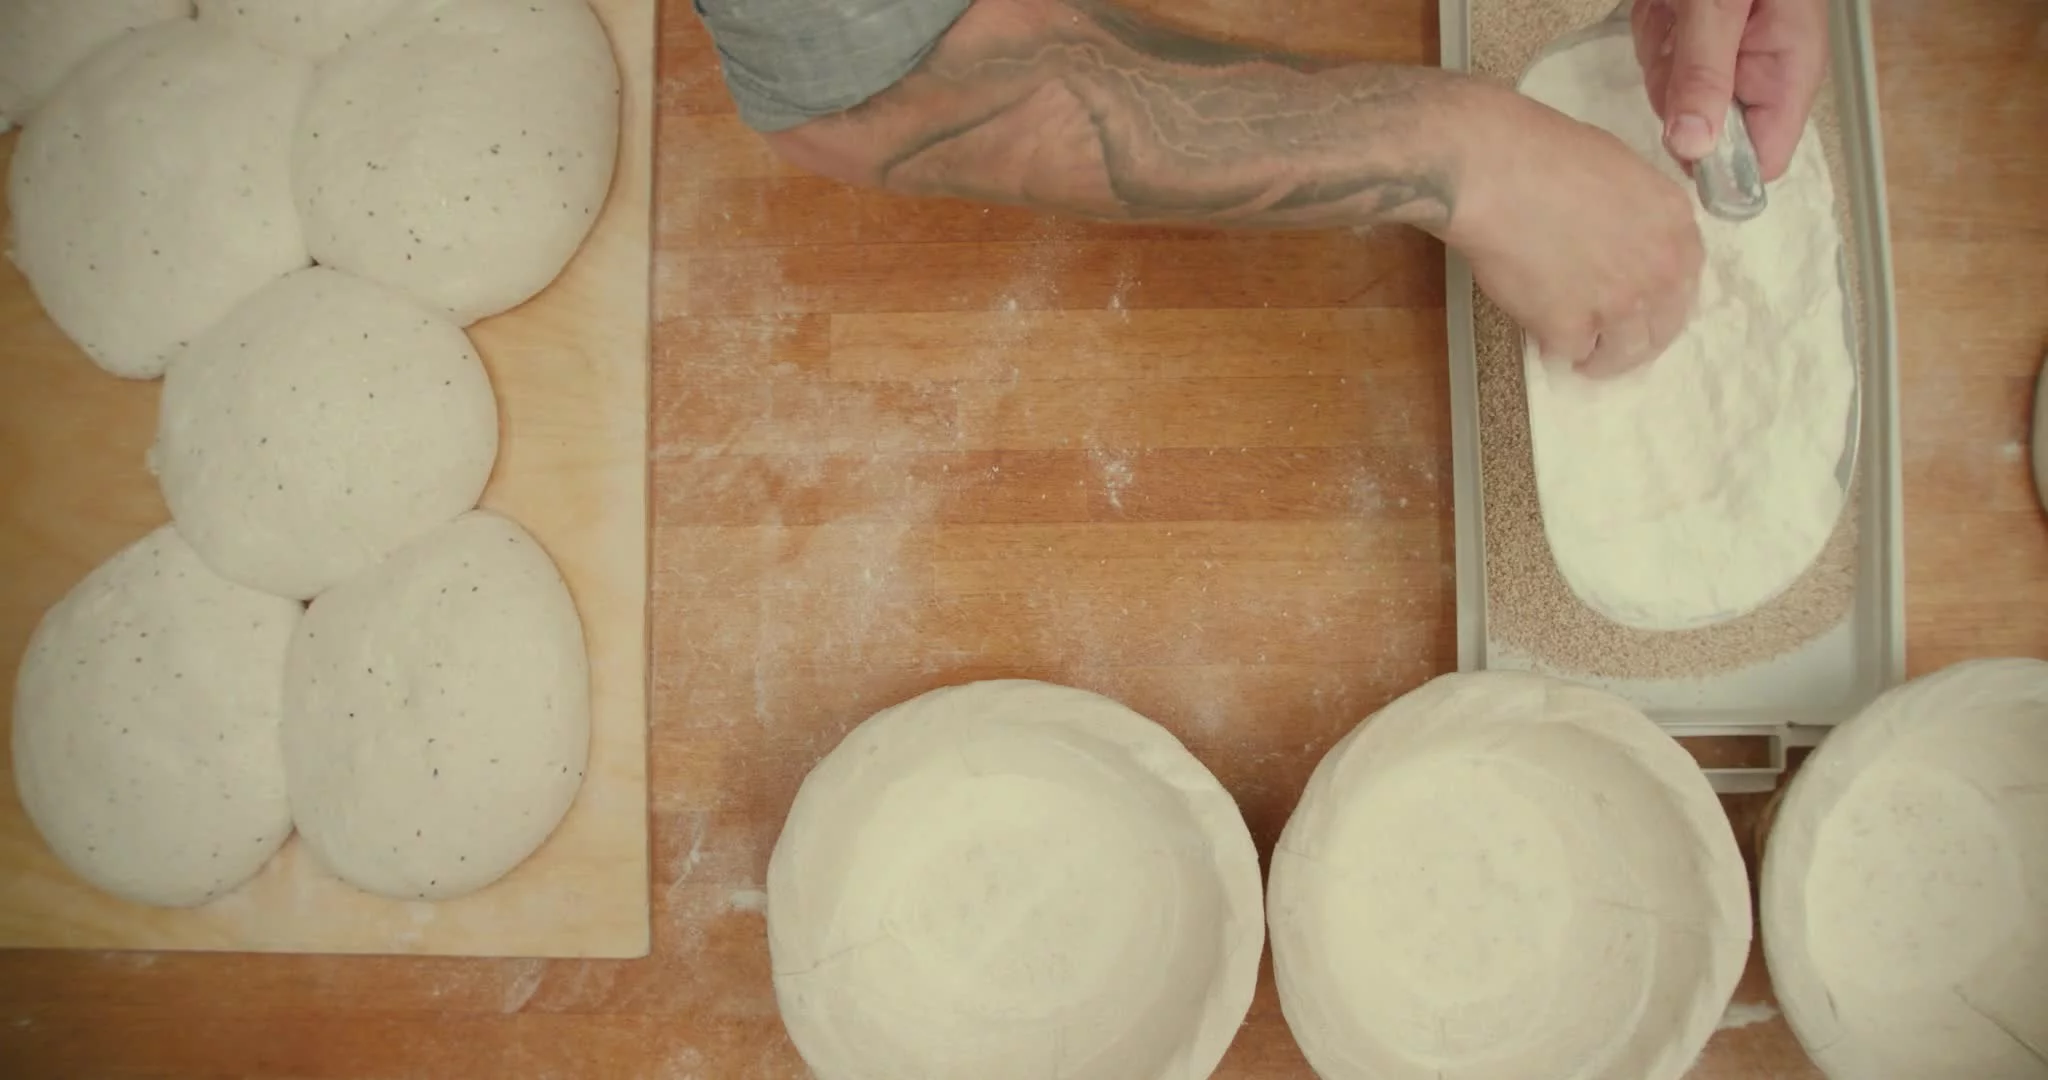
City Loaf Master Recipe - Final Shape
Sprinkle a combination of all-purpose and rice flour into the bannetons and sprinkle a very light dusting of all-purpose flour over the top of the loaves.
Using your bench scraper, shimmy the dough into an oval shape, using just a few moves to get it into more of an oval than a round. Hold one hand over the center of the loaf, take your scraper in the other hand, and scrape evenly across the surface of the table toward the loaf, lifting it up and into the other hand. Put down the scraper and cradle the loaf in both hands. Now fold it inward and gently place it into the basket.
If it tries to fall back open, you can gently pinch it together at the top. That’s it. It’s safe and happy just the way it is. No need for aggressive shaping.
-
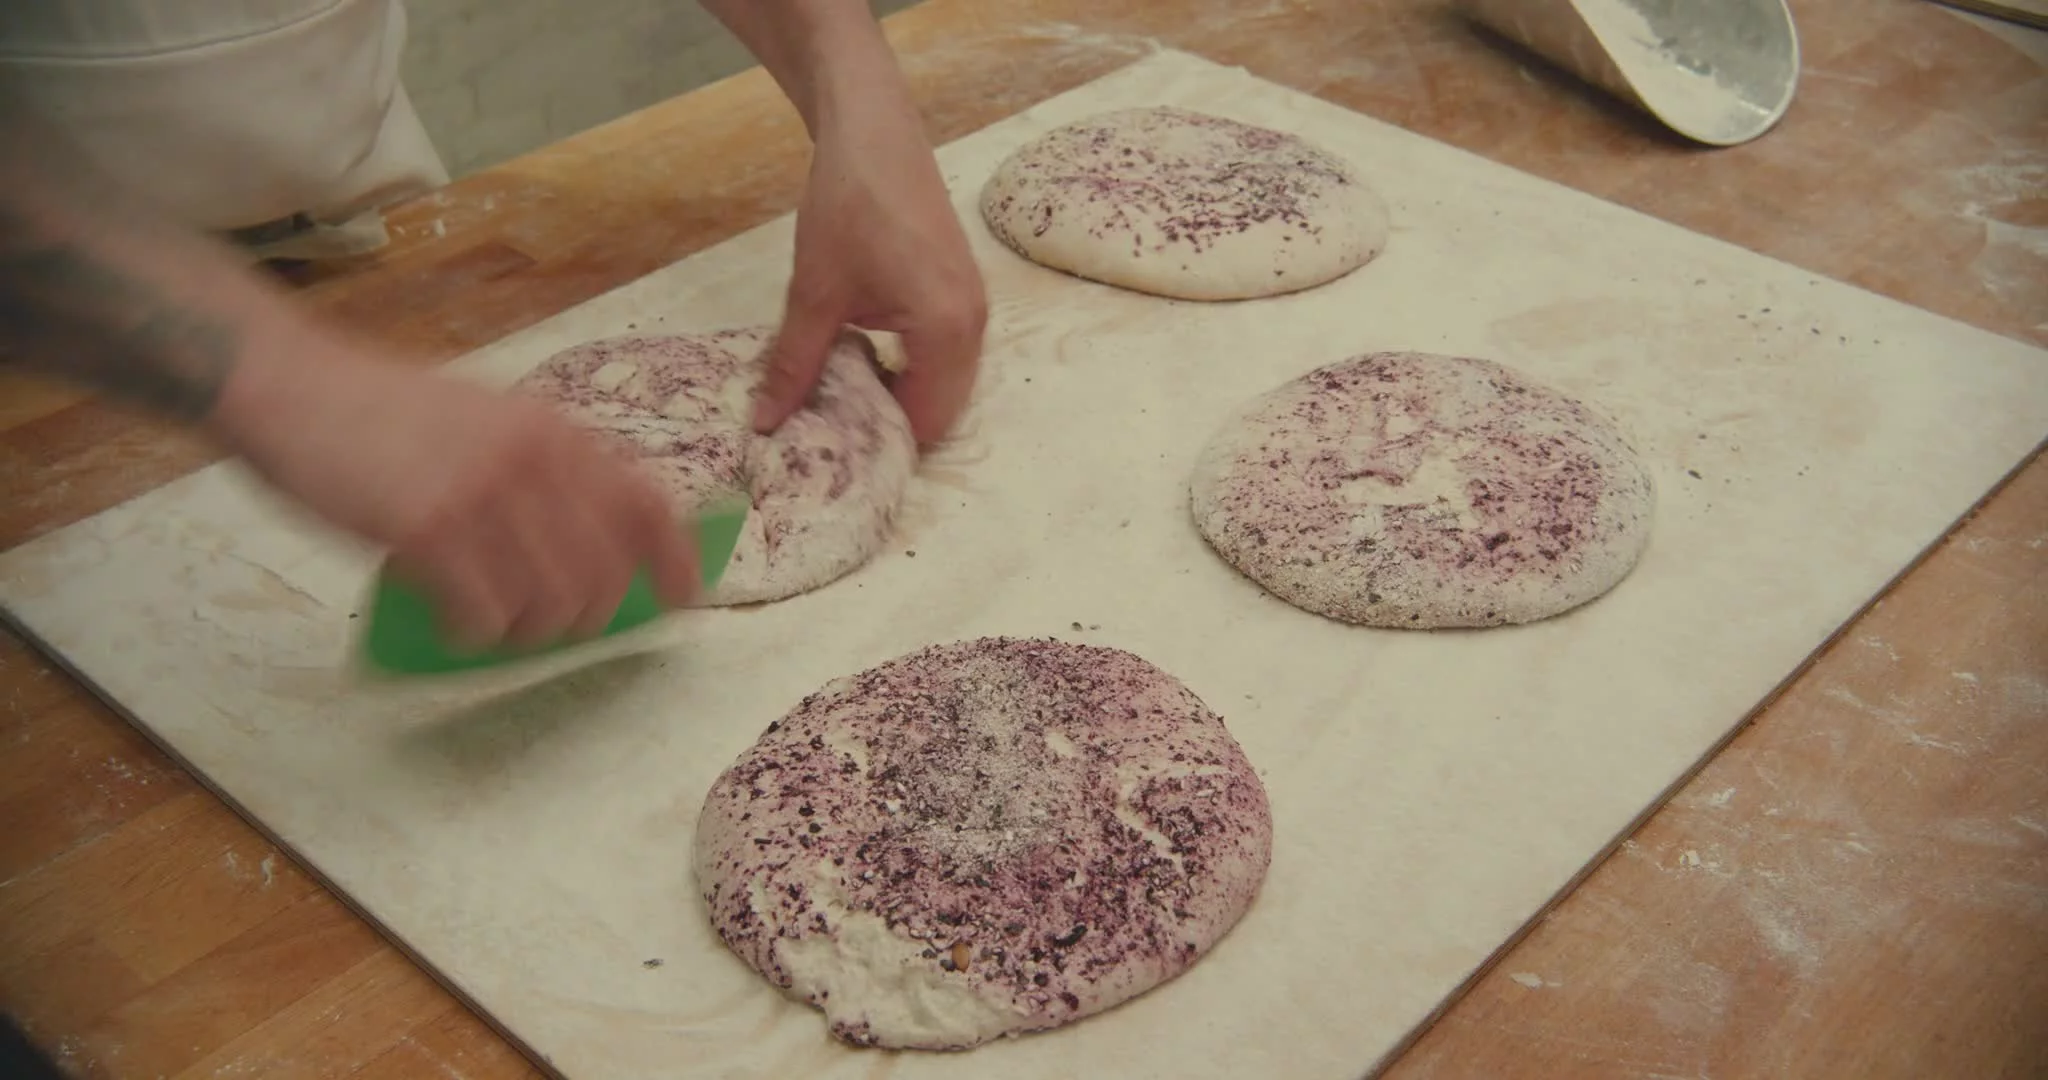
Sesame City Loaf - Final Shaping
When you mix the dough, add the toasted sesame seeds. When you do the final shaping, scatter the untoasted sesame seeds onto a plate and rock the top half of the preshaped loaves in the seeds to coat them before transferring them to baskets for proofing.
-
Sand Dollar - Final Shape
For the sand dollar, set a couche on a cutting board or sheet pan and sprinkle it liberally with rice flour. Scatter the handful of cornmeal onto a plate. Rock the preshaped loaves in the cornmeal to coat one half, and gently transfer them, cornmeal side up, onto the couche, which will let the dough relax more as it cold retards. Sprinkle the tops of the loaves with any remaining cornmeal. Arrange the couche around the sand dollar loaves to support their structure.
-
Perfect Sandwich Bread, Or BFKAC - Final Shape
Place a sheet pan or shallow roasting pan on the floor of the oven. Arrange a rack in the middle of the oven. Place a pizza stone on the rack. Preheat to 450°F / 230°C.
Keeping the dough on the couche, gently shape both pieces into flat loaves measuring about 12 × 6 inches / 30 × 15cm. Unless you have a huge pizza stone, you will need to bake the loaves one at a time.
Dust a baking peel and a transfer board with rice flour. Gently pull the edges of the couche to flip one loaf onto the transfer board. Invert the loaf onto the peel and transfer it from the peel to the pizza stone. Add about 250ml water to the pan on the oven’s floor, taking care to avoid exposing your skin directly to the resultant steam, which can burn.
Bake the loaf for 20 to 25 minutes, until it has developed a golden brown crust. Remove it from the oven and let it cool on a rack, until cool enough to handle. Repeat with the remaining loaf.
-
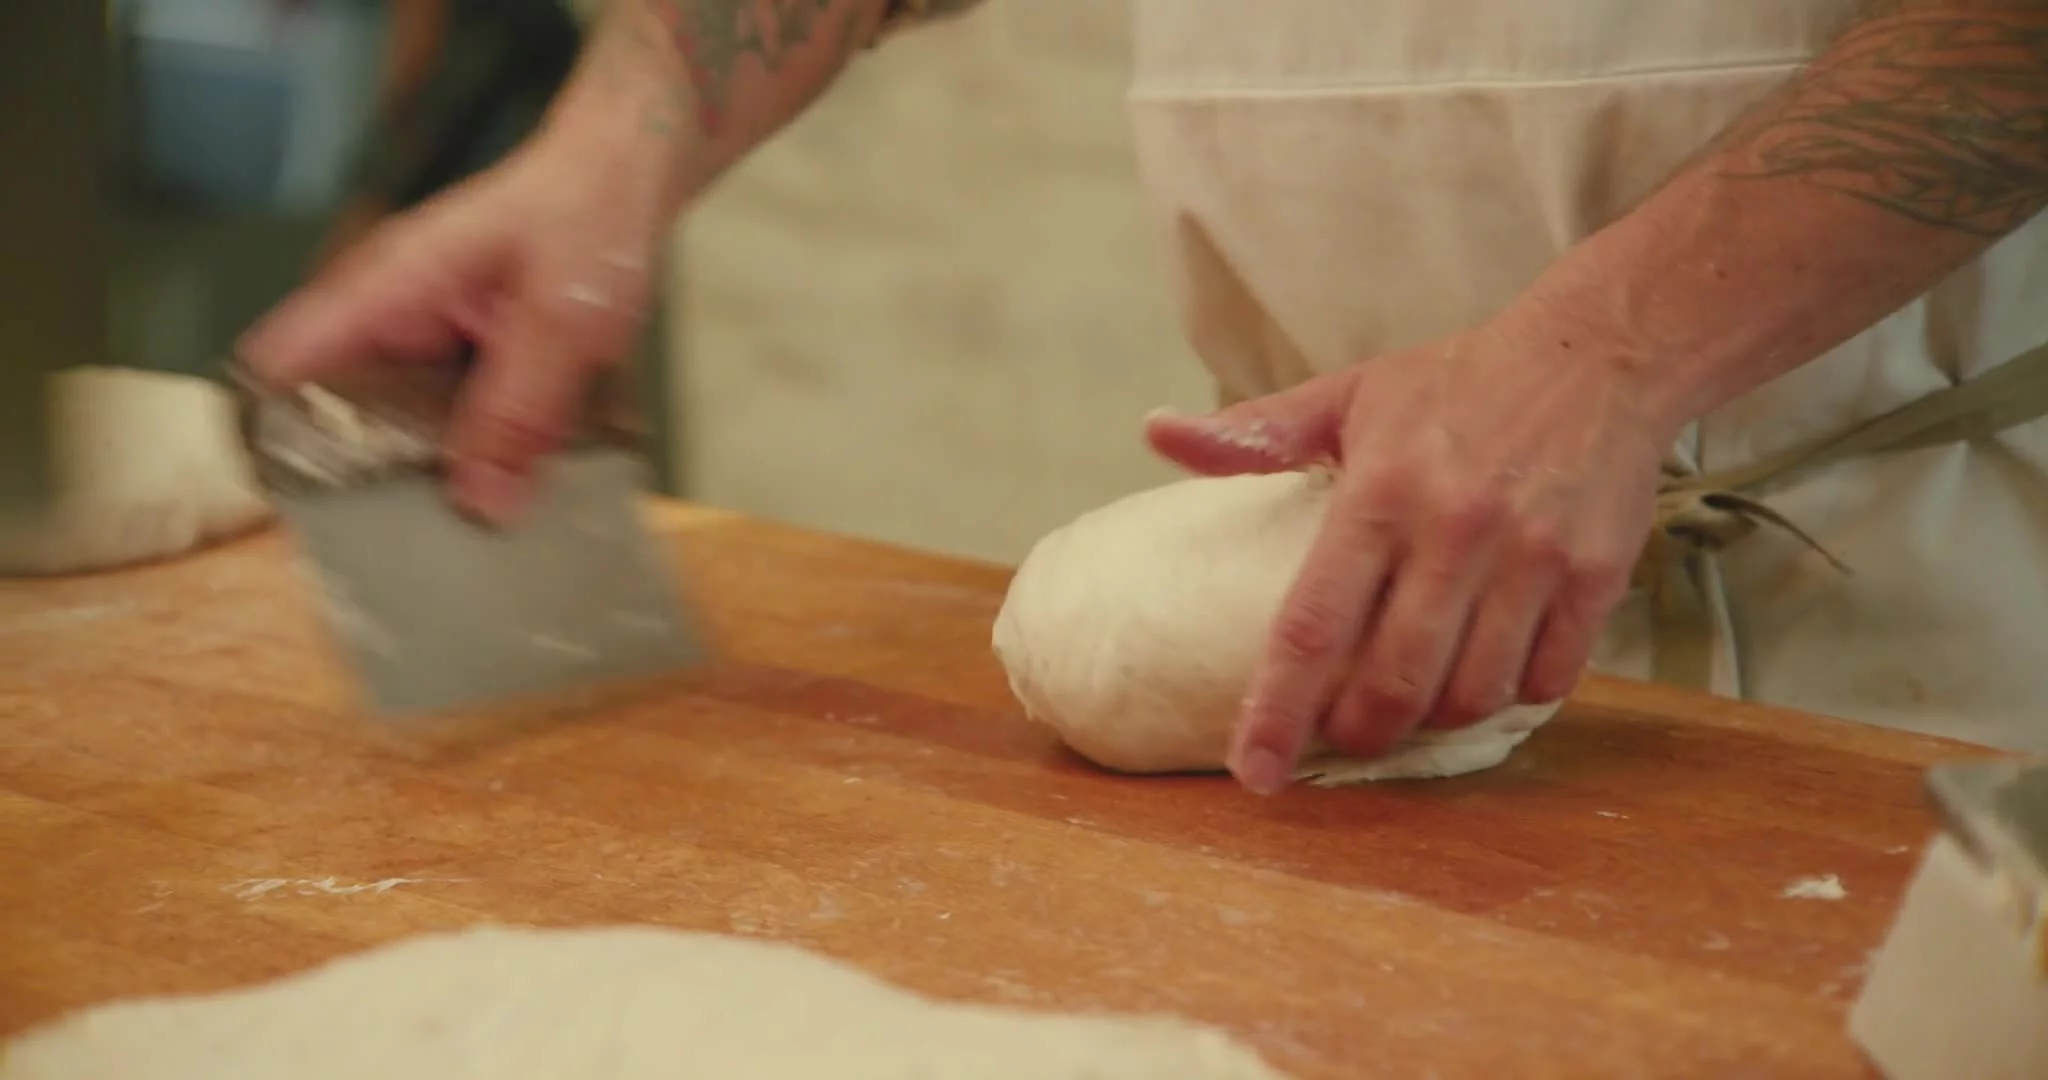
Real Italian Ciabatta - Divide and Shape the Dough
Flour your work surface well and gently flip your dough out onto it. Sprinkle another layer of flour over the top of the dough.
Using your bench scraper, cut the dough into 10 rectangles of roughly the same size. Be as gentle as possible when handling the dough, so you keep as much air encased inside as possible.
-
Morning Buns - Day 2 - Coat and Divide the Buns
Remove the dough from the fridge, take the lid off the container, and let it come to room temperature. Flour the work surface with a combination of all-purpose and rice flours. Turn the dough out onto the floured work surface and gently press it down with flat hands, to make sure the dough is evenly distributed. Set up a sheet pan nearby, lined with parchment paper, to transfer the buns onto after they are cut.
Distribute your choice of oats and/or seeds evenly over the entire surface of the dough, pressing down gently if necessary to make sure that they adhere. Use the bench scraper to decisively cut the dough into 6 equal pieces of 150g each. Each bun will be a slight rectangle shape. Use the bench scraper to flip each individual bun into your open palm, coating side down to avoid sticking, then swiftly turn each bun, coating side up, onto the prepared sheet pan to rest while you preheat the oven.
There’s no need for a final proof here; once they’re shaped and the oven is hot enough, you can bake them.
-
Fougasse - Day 2 - Final Shape
Use a flexible plastic scraper to cut 4 to 6 slits in the dough, angled outward from a center “stem.” The idea traditionally is to make it look like a sheath of wheat, but mine are more free-form. The cuts also create more surface area for browned crust. Stretch out the dough to open each slit as you cut it and make each segment of dough about 2 inches / 5 cm wide and thick.
-
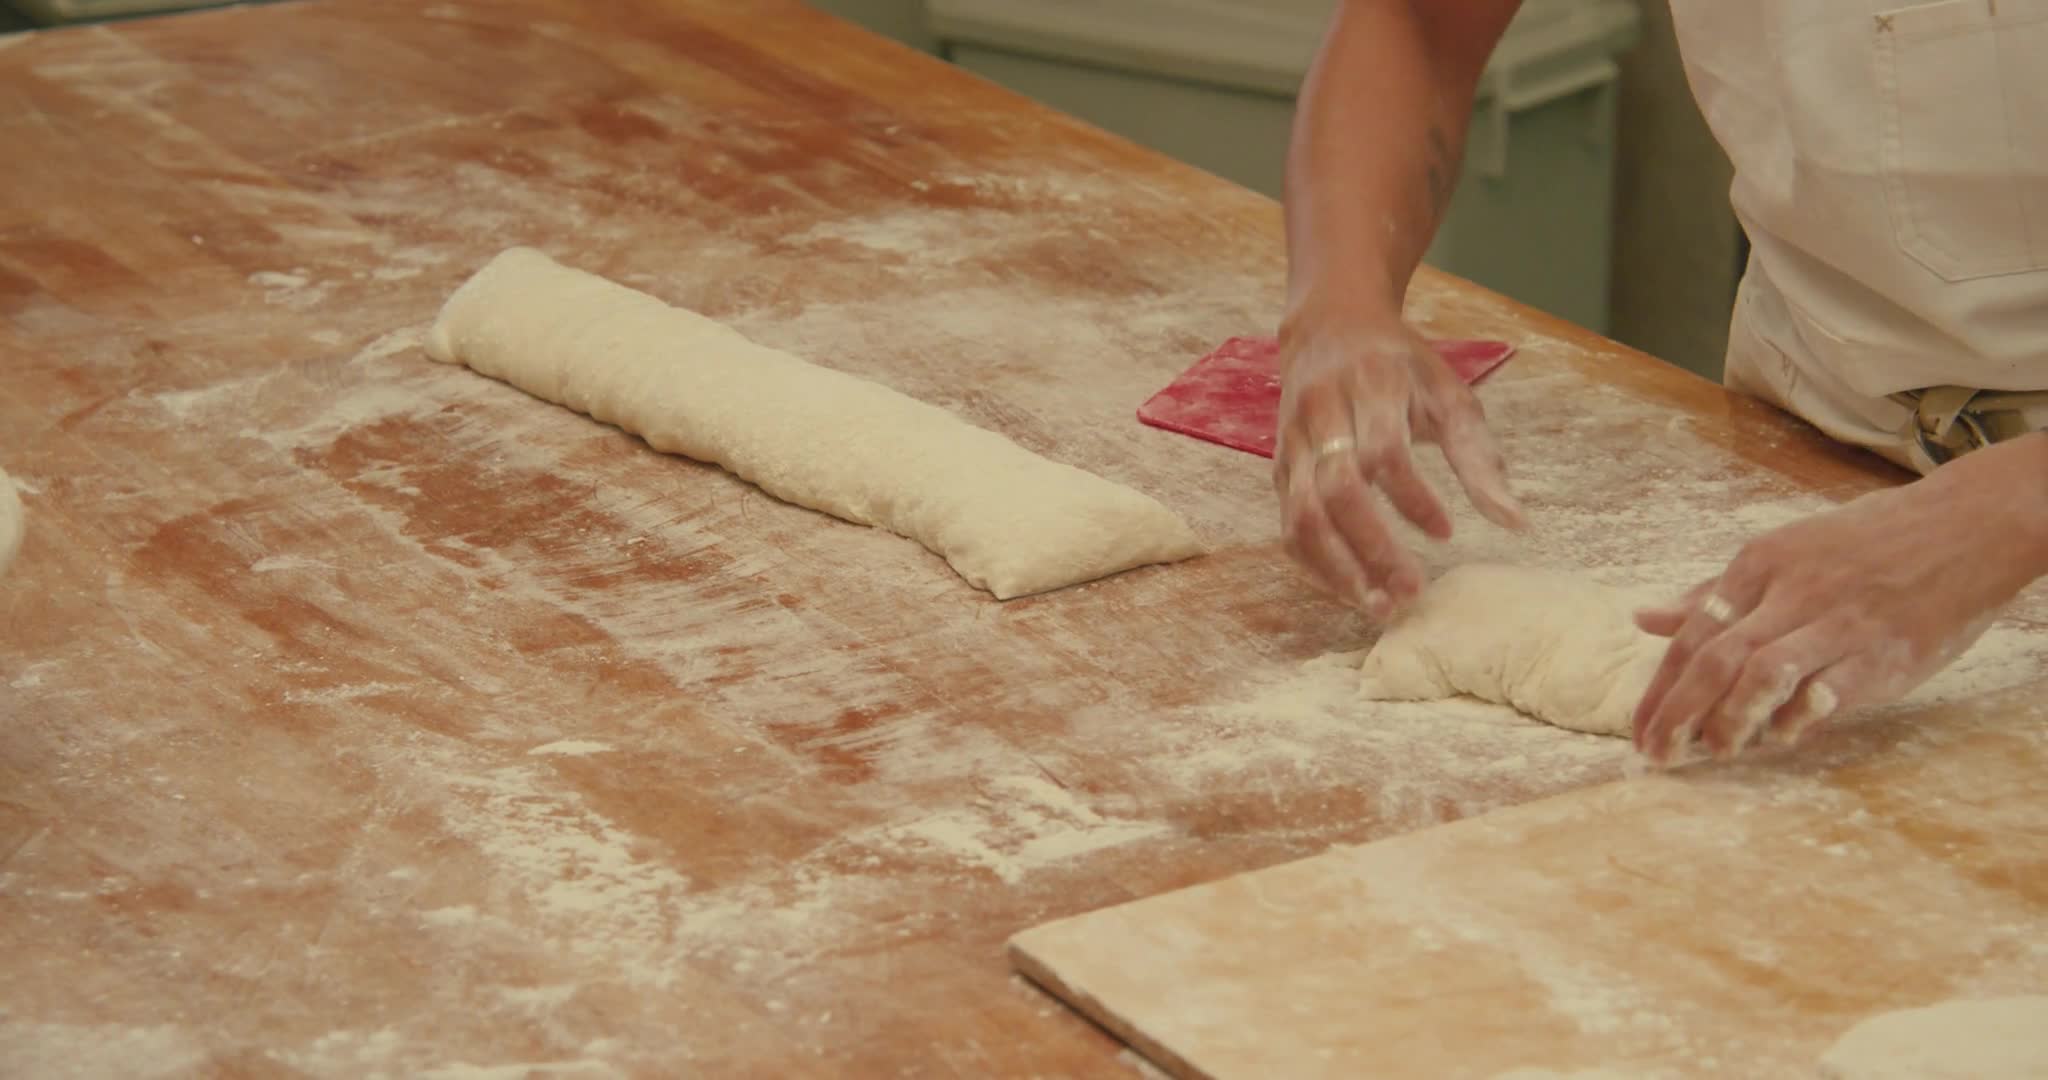
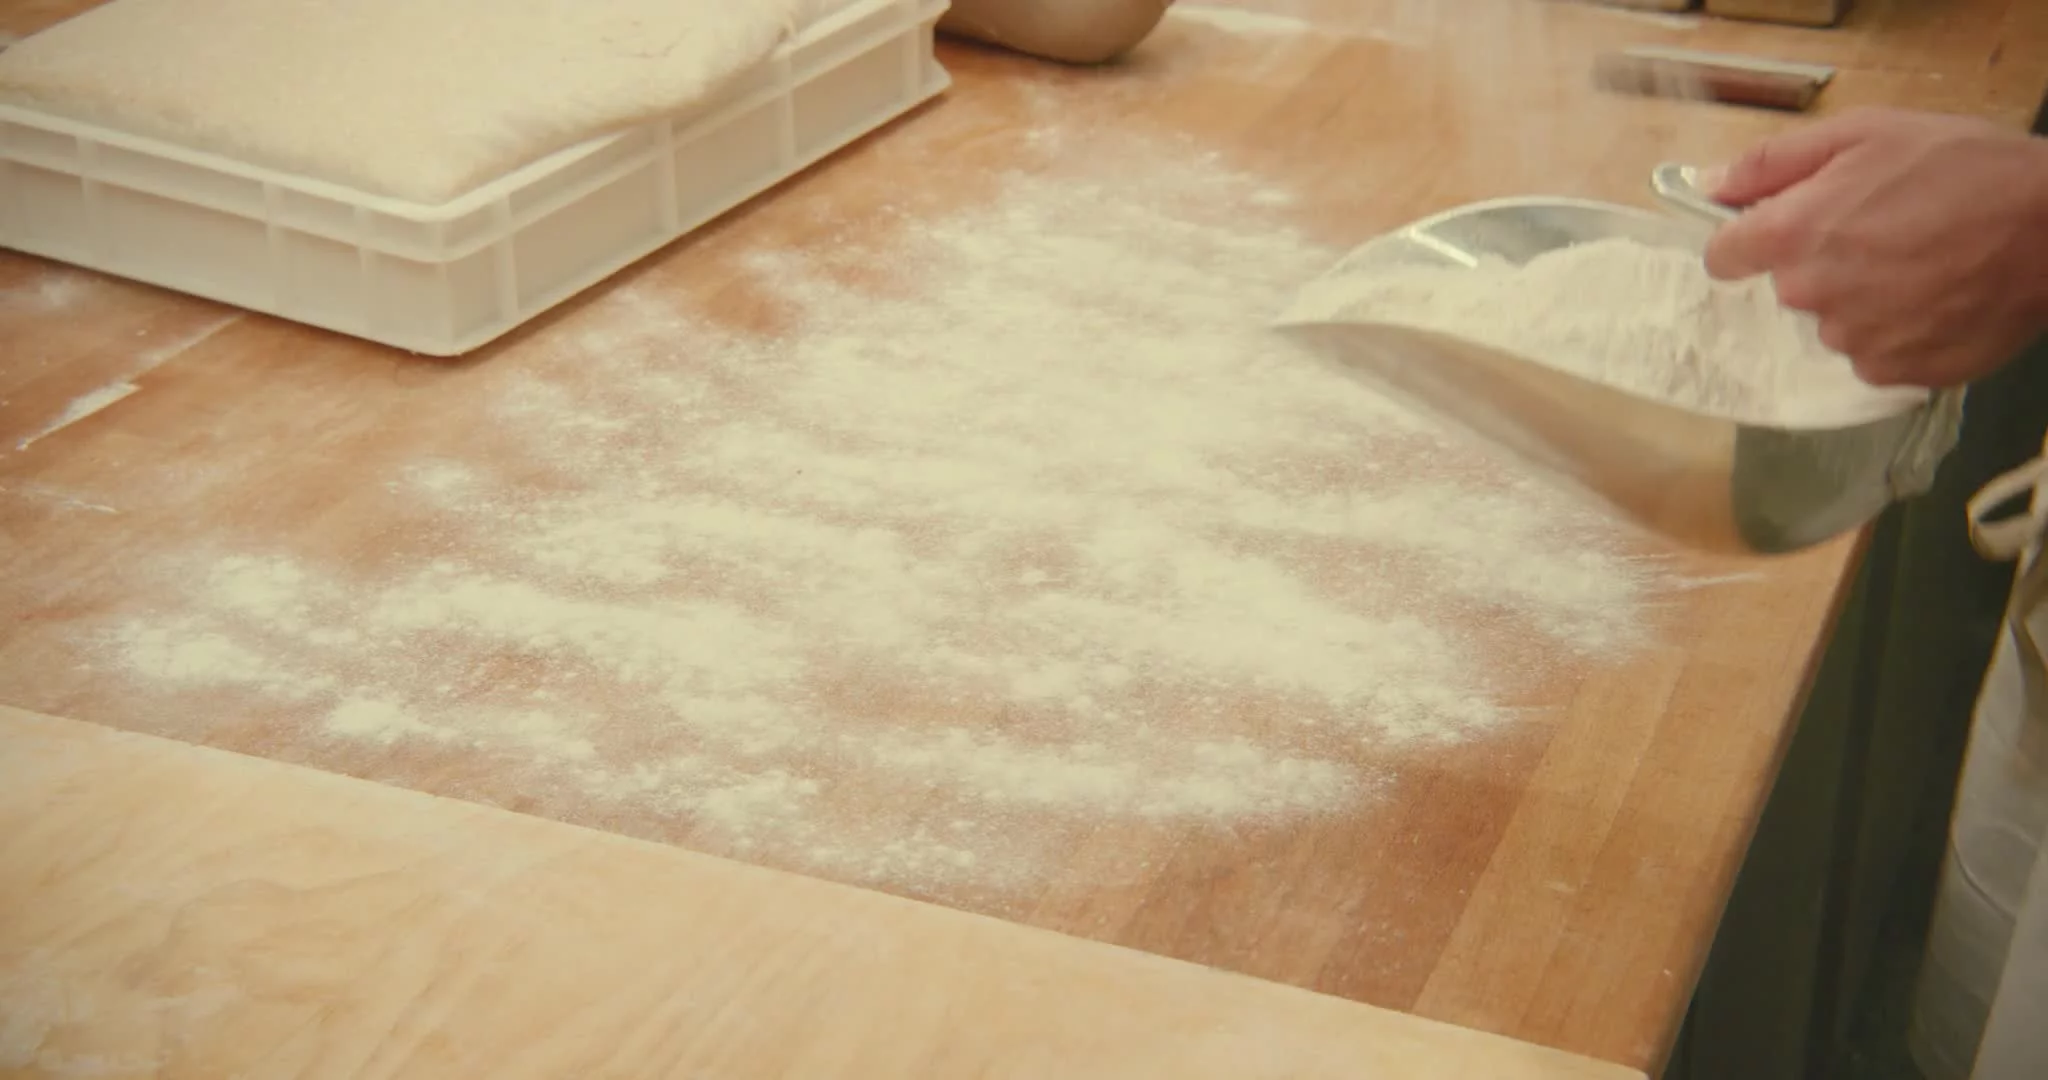
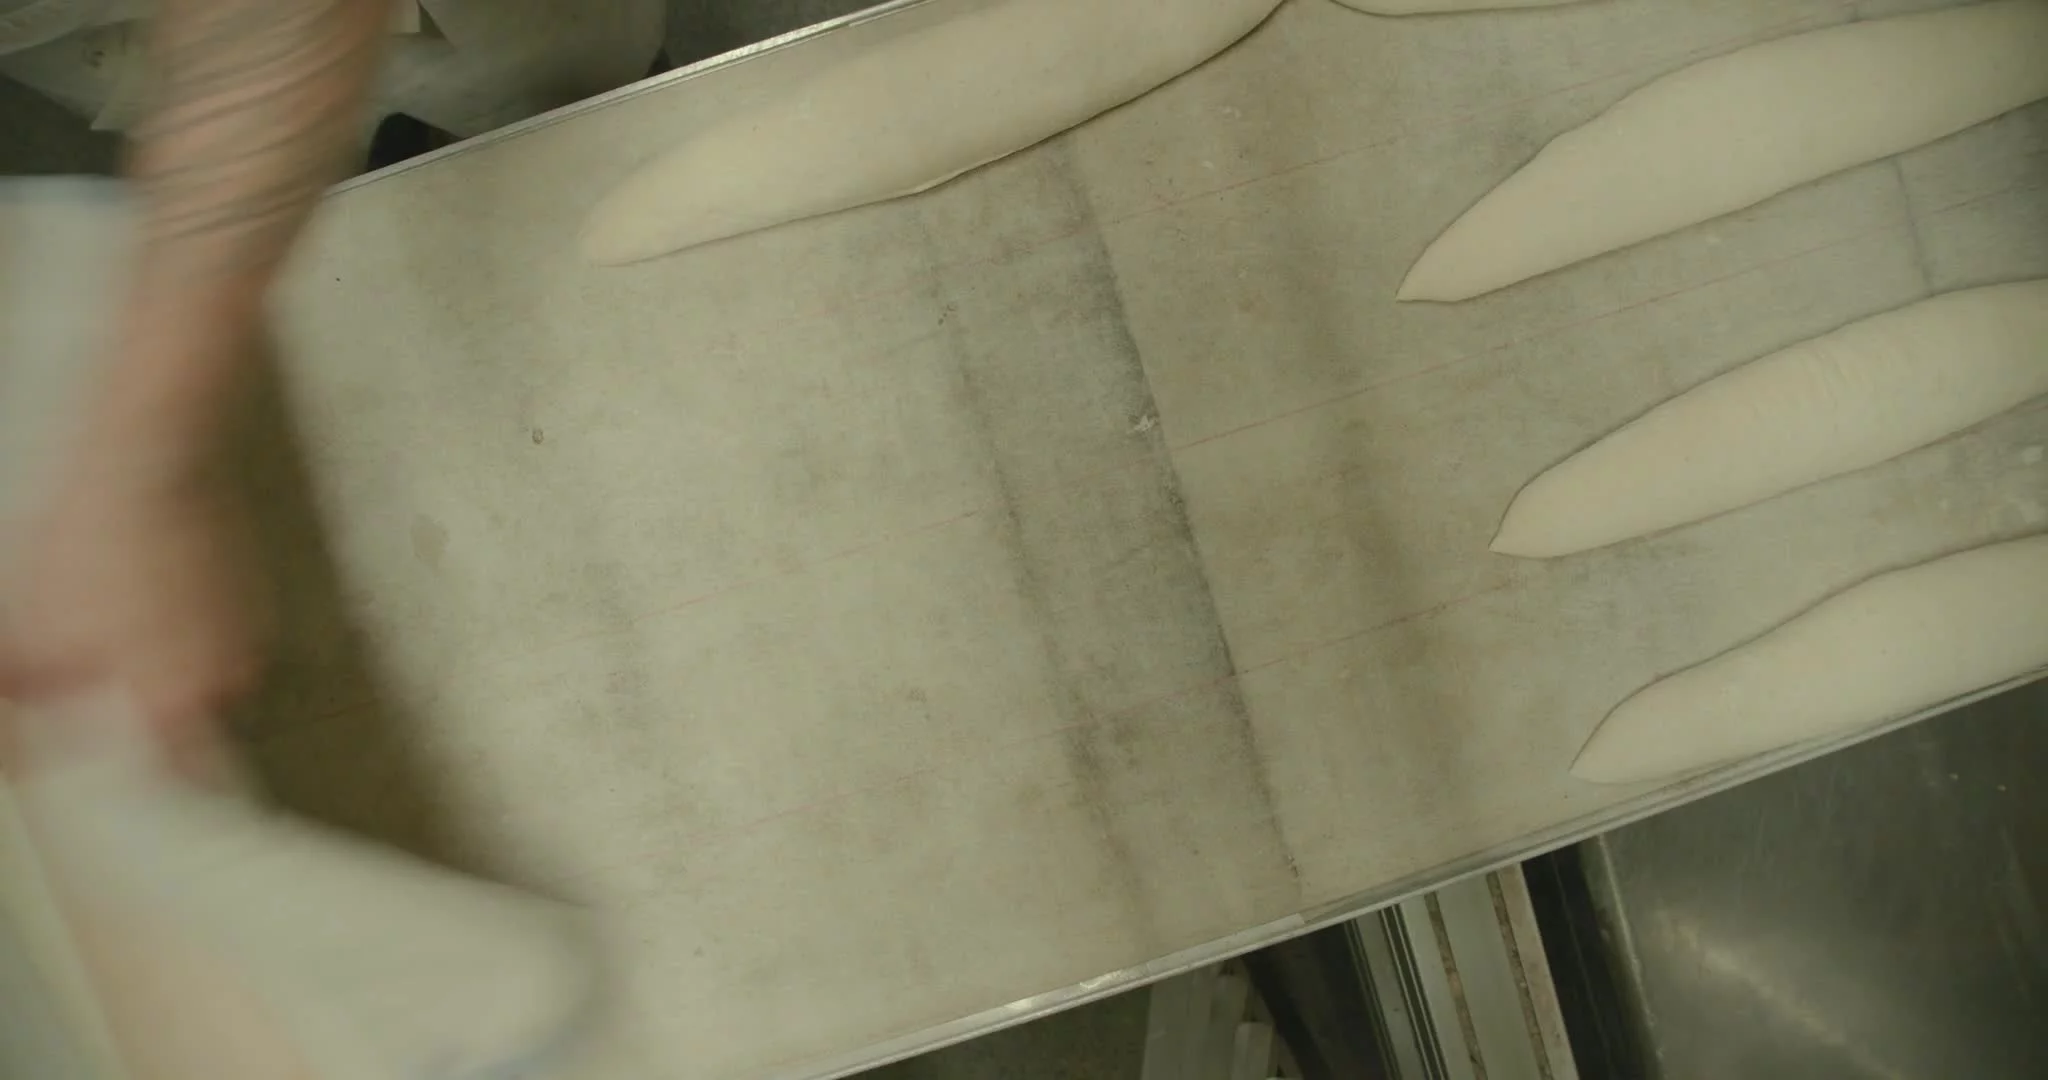
Baguettes - Divide and Preshape
Sprinkle some rice flour onto your clean work surface. Use the flexible plastic scraper to ease the dough out of the bowl. Use the bench scraper to divide the dough into 3 portions of 400g each.
With a wet hand and the bench scraper, preshape each portion into an oval, using swift movements with the scraper and tucking the dough underneath itself with your fingertips. Let the dough rest uncovered for 30 minutes.
-
Baguettes - Final Shape
Check for dryness on the surface of the dough. If it has formed a dry skin, mist the surface with water. Use damp hands to gently flatten out a loaf into roughly an 8 × 12-inch / 20 × 30cm rectangle. Working from the long side, pull a strip of the dough toward you and roll it on itself. Seal the resulting seam with the backs of your hands. Then pull that roll toward you, and roll it back over itself, and again seal the seam. The idea is to create a tight cylinder with the dough, which will give it good shape and surface tension as it rests and bakes. Continue pulling and rolling until you have completely rolled the dough into a tight cylinder. Don’t try to lengthen the dough at this point; the goal is only to wrap a cylinder, and lengthening the dough will make it more difficult to flour the seam.
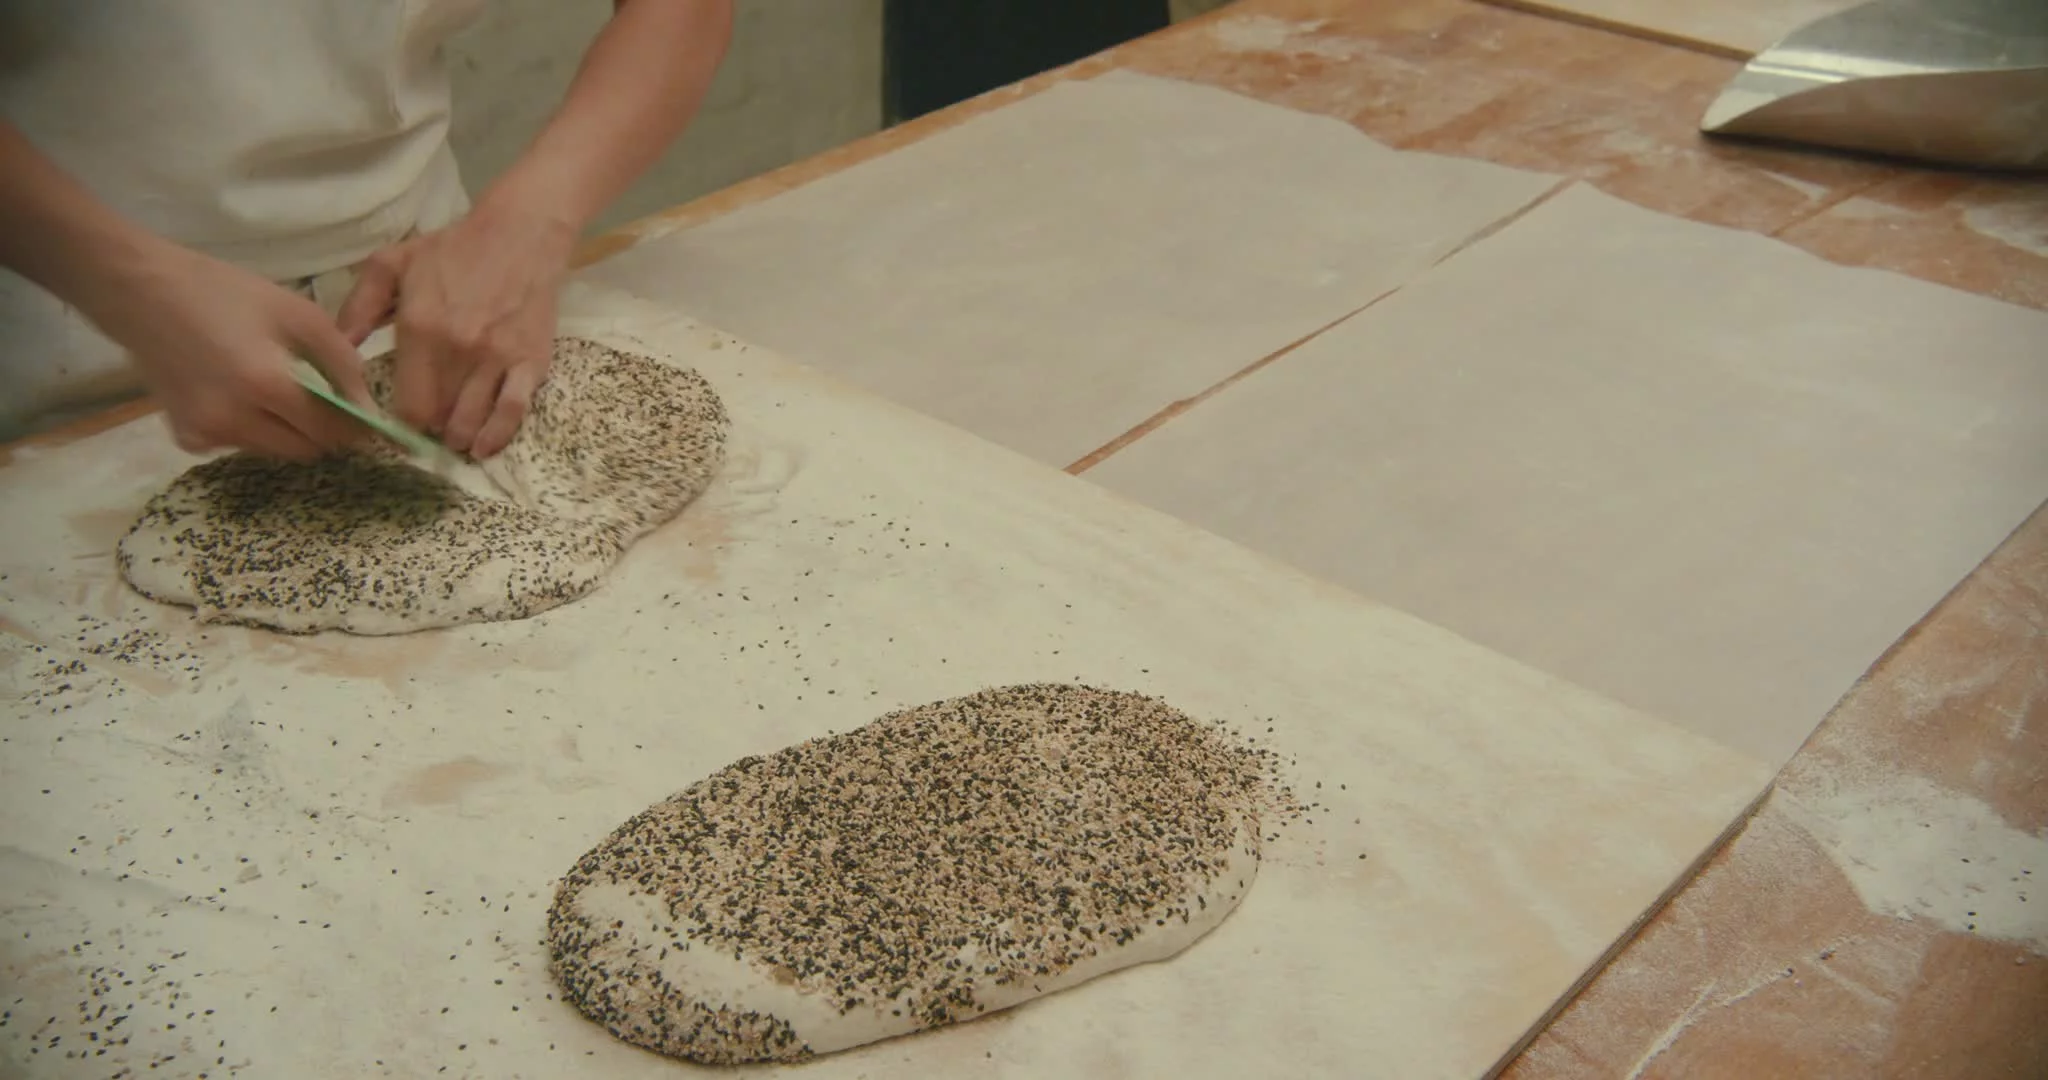
Set up a plate nearby with a well-mixed handful of rice and all-purpose flour. Spread the couche out on a sheet pan or large cutting board and dust it lightly with the flour mixture. If the dough is stuck to the work surface, use the bench scraper to gently ease it away from the table. Flour your nondominant hand, place it atop the baguette, and use the bench scraper to shift it off the table, inverting it into your nondominant hand. Dip the seam in flour, gently return the baguette to the work surface, and then start the rolling process.
Roll the dough all the way toward you, and then all the way back, repeating this process several times, and press- ing down lightly each time to evenly extend and lengthen the baguette. The final length should be 16–18 inches / 40–45 cm. If you like, you may roll the ends into points, using a bit of extra pressure with your fingertips. Once again, dip the seam into the flour mixture and transfer the rolled-out baguette to the couche. Pull up a fold of the couche on either side of the baguette to properly support its shape.
Repeat the final shaping procedures for the remaining 2 baguettes. Let the baguettes rest for 45 minutes to 1 hour, until they have expanded and relaxed a bit.
-
Baguettes - Scoring
Sprinkle a bit of rice flour onto a baker’s peel. Place the transfer board alongside one baguette and use the couche to gently invert the baguette onto the board. Invert the baguette from the board onto the peel. Use the lame to make 5 even scores, straight down the center line of the baguette, very slightly offset from each other.
-
Kathleen Weber's Rosemary and Lemon Bread - Final Shape
Use a bench scraper to get one loaf in front of you. Use a soup spoon to transfer about half of the rosemary lemon oil to the center of the dough’s surface. Quickly pull and gather all the edges of the loaf into one hand, rolling them together and pressing the edges to seal the oil in. Scrape or brush away any excess flour on the work surface; you want the dough to slightly stick to the surface for this next part. Turn the dough over so that the seam is now facing down.
Use your hands, cupped around either side of the loaf, to start gently shaping it back into a round, applying light pressure to both sides as you turn and shape the loaf, so that the oil on the bottom of the loaf gets shimmied up the center of the loaf, ending up visibly close to the surface. Once you can see the oil through the surface of the loaf, stop shaping. Use the bench scraper to invert the loaf into a floured proofing basket. Repeat with the other loaf.
-
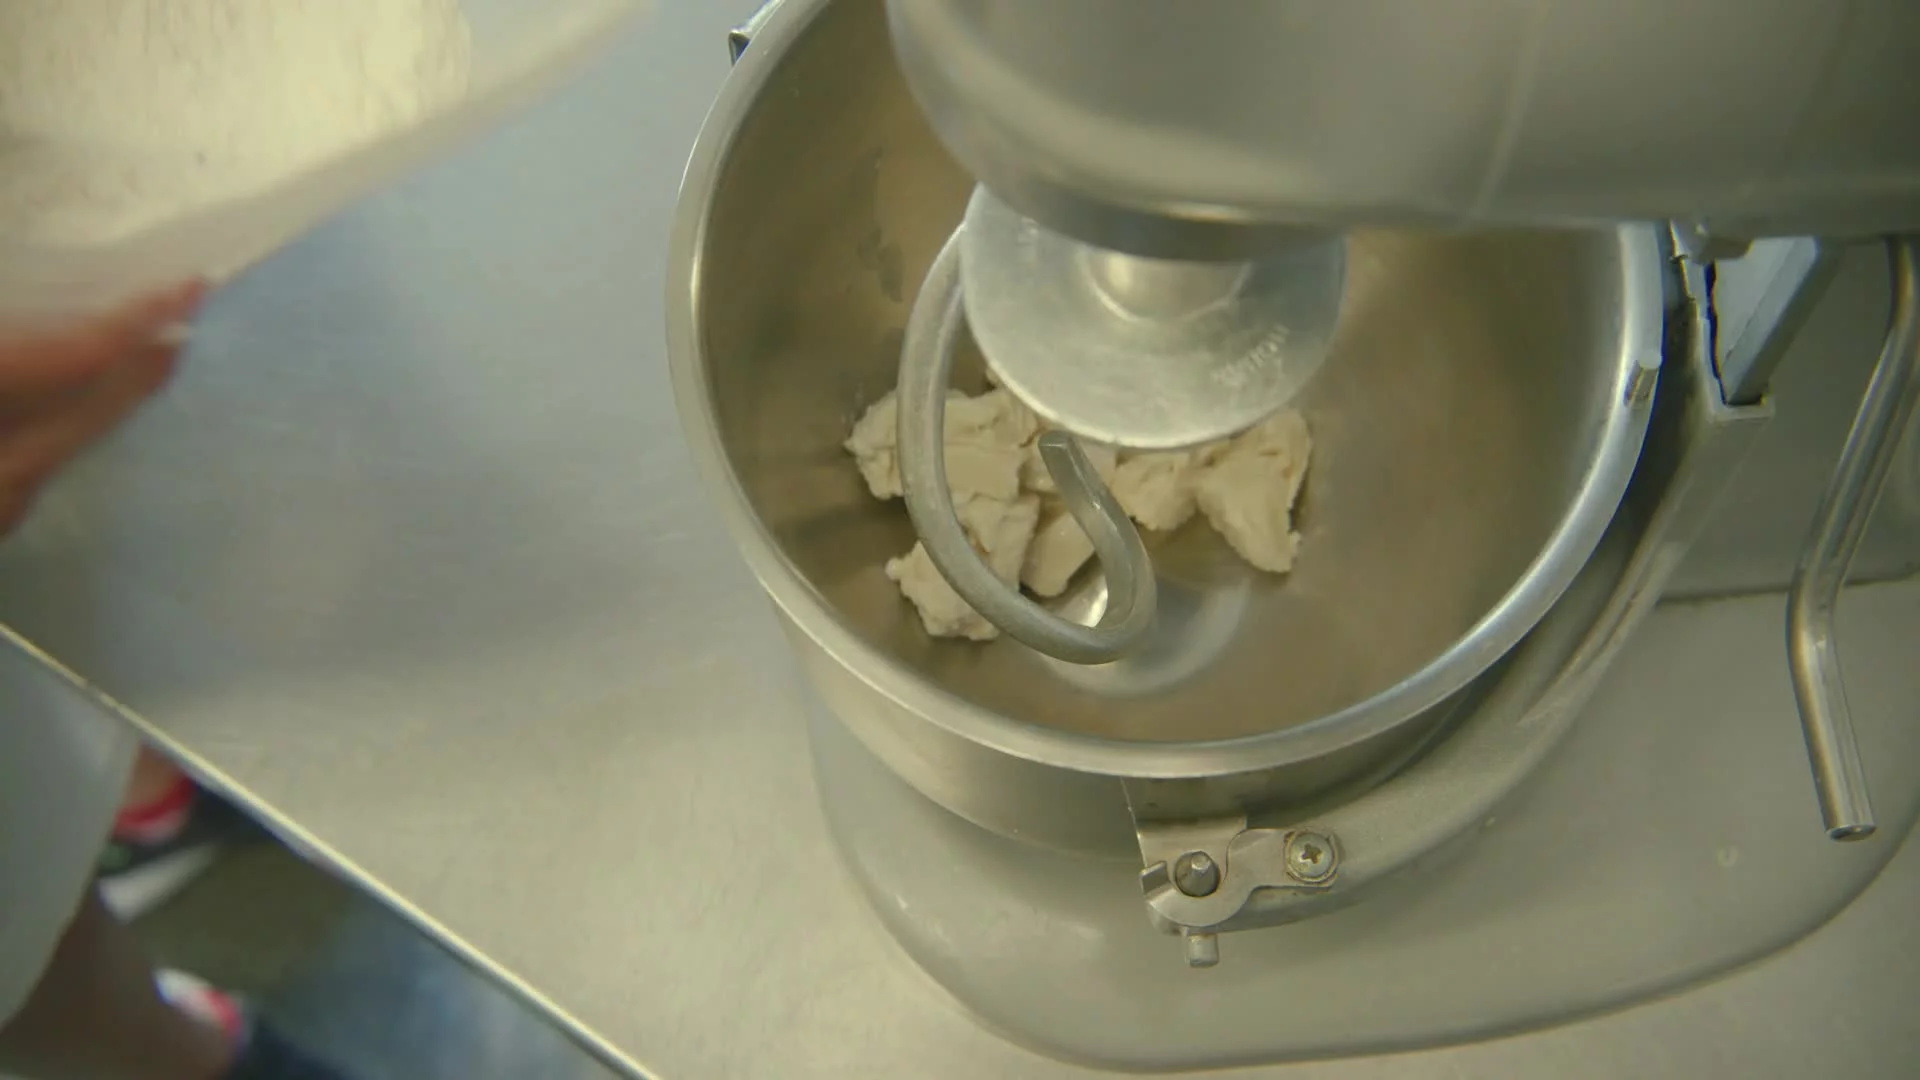
Brioche Master Recipe - Mix the Dough, Part 1
Once the starter is ready, in the bowl of a stand mixer fitted with the dough hook, combine both flours, the eggs, starter, scalded rye, water, sugar, and milk powder. Start the mixer on low speed and increase the speed to medium, mixing until the dough is smooth and cohesive, about 3 minutes.
Let the dough rest for 20 minutes.
-
Brioche Master Recipe - Mix the Dough, Part 2
Add the salt and yeast and mix the dough again on medium speed for 5 to 8 minutes. The dough will start to move as one cohesive unit, balled up around the hook.
It will be ready for the butter when it’s very strong, showing good resistance when you try to pull a piece away from the mass. The gluten needs to be at maximum strength before you start adding all the fat from the butter.
Gradually mix the butter in, one-quarter of it (40g) at a time. After each addition, mix the dough until the butter is incorporated, then add the next 40g, and repeat until it all has been incorporated. You will have a silky, glossy, smooth dough.
-
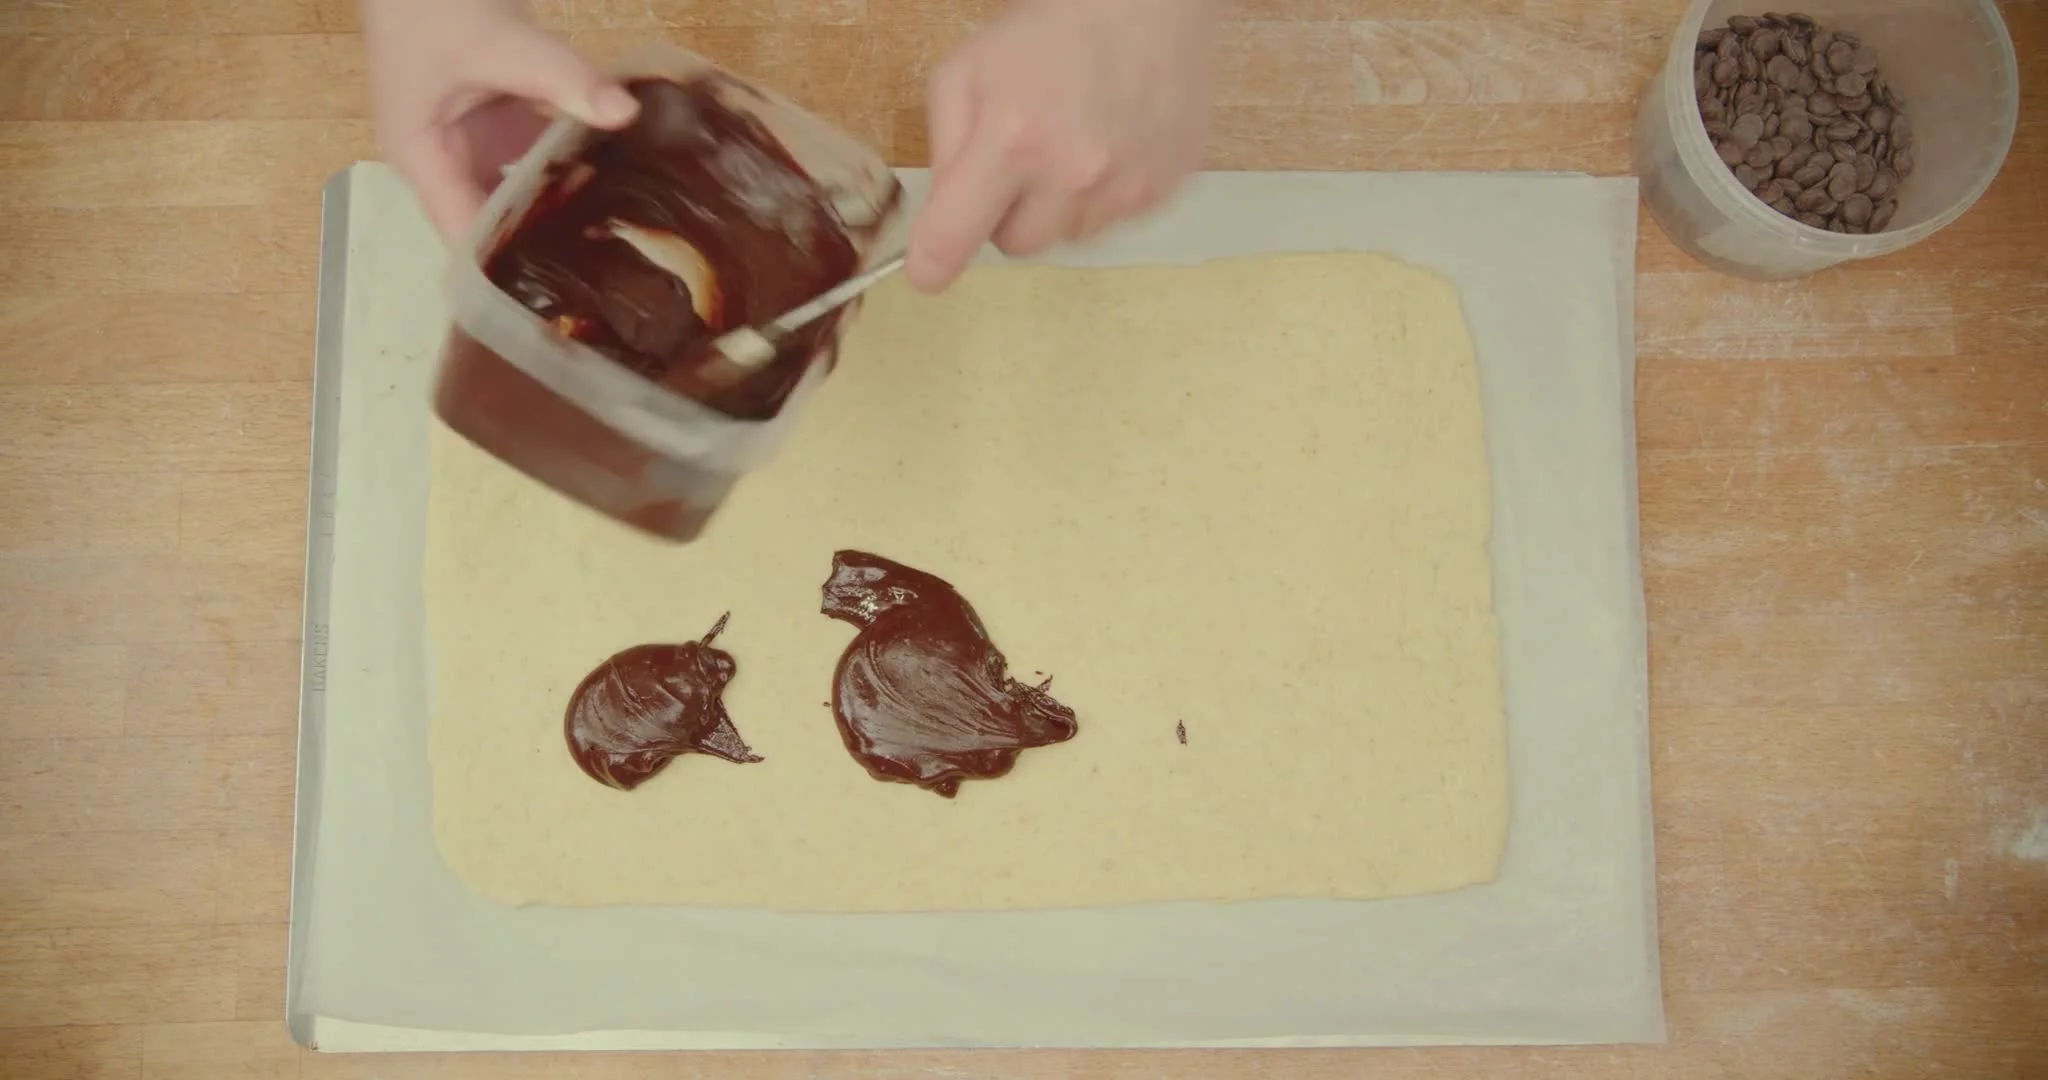
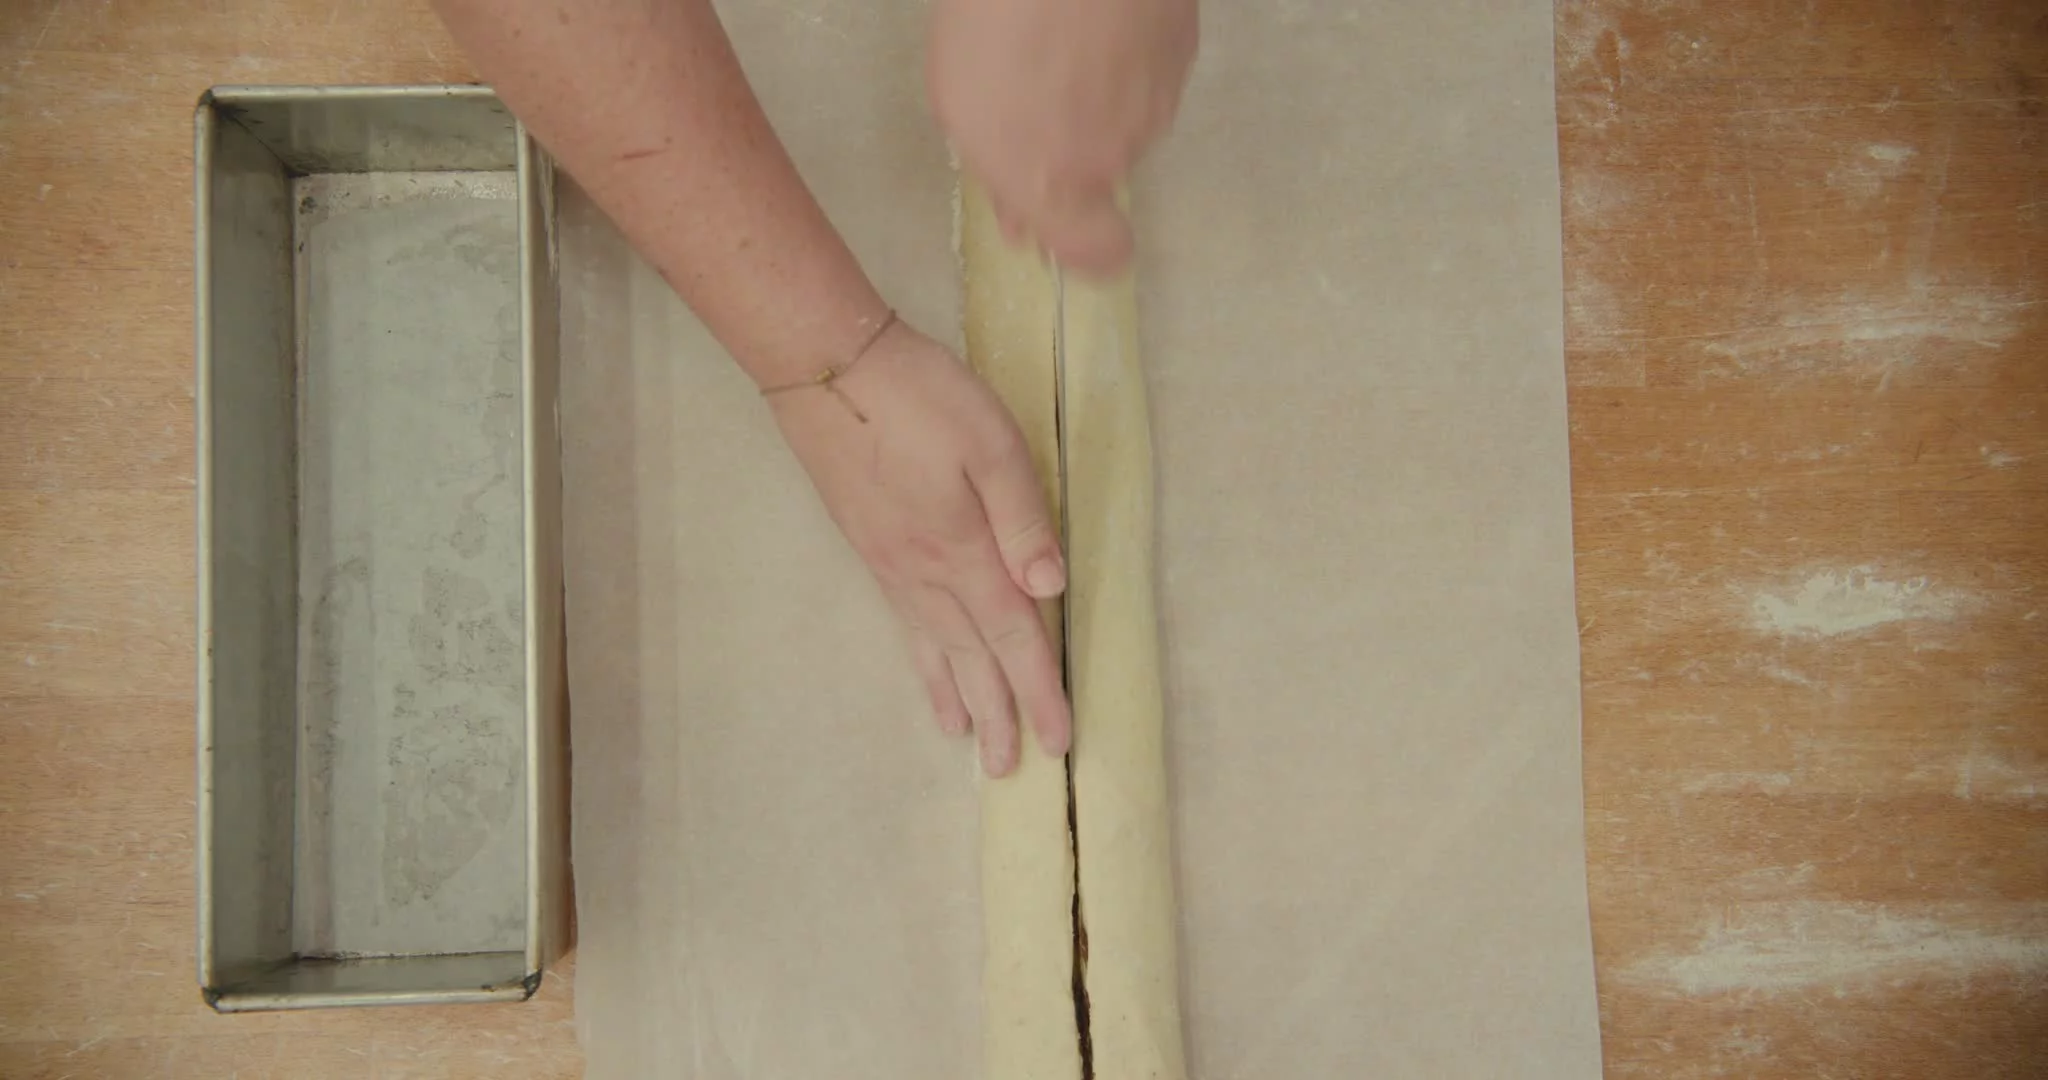
Babka - Roll, Fill, and Chill the Babka
Turn the chilled dough out onto your work surface, gently punching it down to release the excess gases, and roll the dough out into a 12 × 8-inch / 30 × 20cm rectangle a scant ¼ inch / 5mm thick.
Spread your chosen filling in a thin layer over the surface of the dough and sprinkle the chocolate chips evenly over the filling. Roll the dough tightly into a log, making sure there are no pockets of air as you roll.
Chill the rolled dough for 1 hour in the fridge, loosely covered.
-
Babka - Twist and Proof the Babka
Butter the loaf pan. Remove the dough from the fridge and use a sharp knife to cut it decisively in half lengthwise. Twist the two halves of the dough around each other, tuck the ends underneath themselves, and lay the babka into the prepared pan.
Let it proof in a warm (75°–86°F / 24°–30°C) place for about 2 hours, until the babka has doubled in size and looks swollen.
-
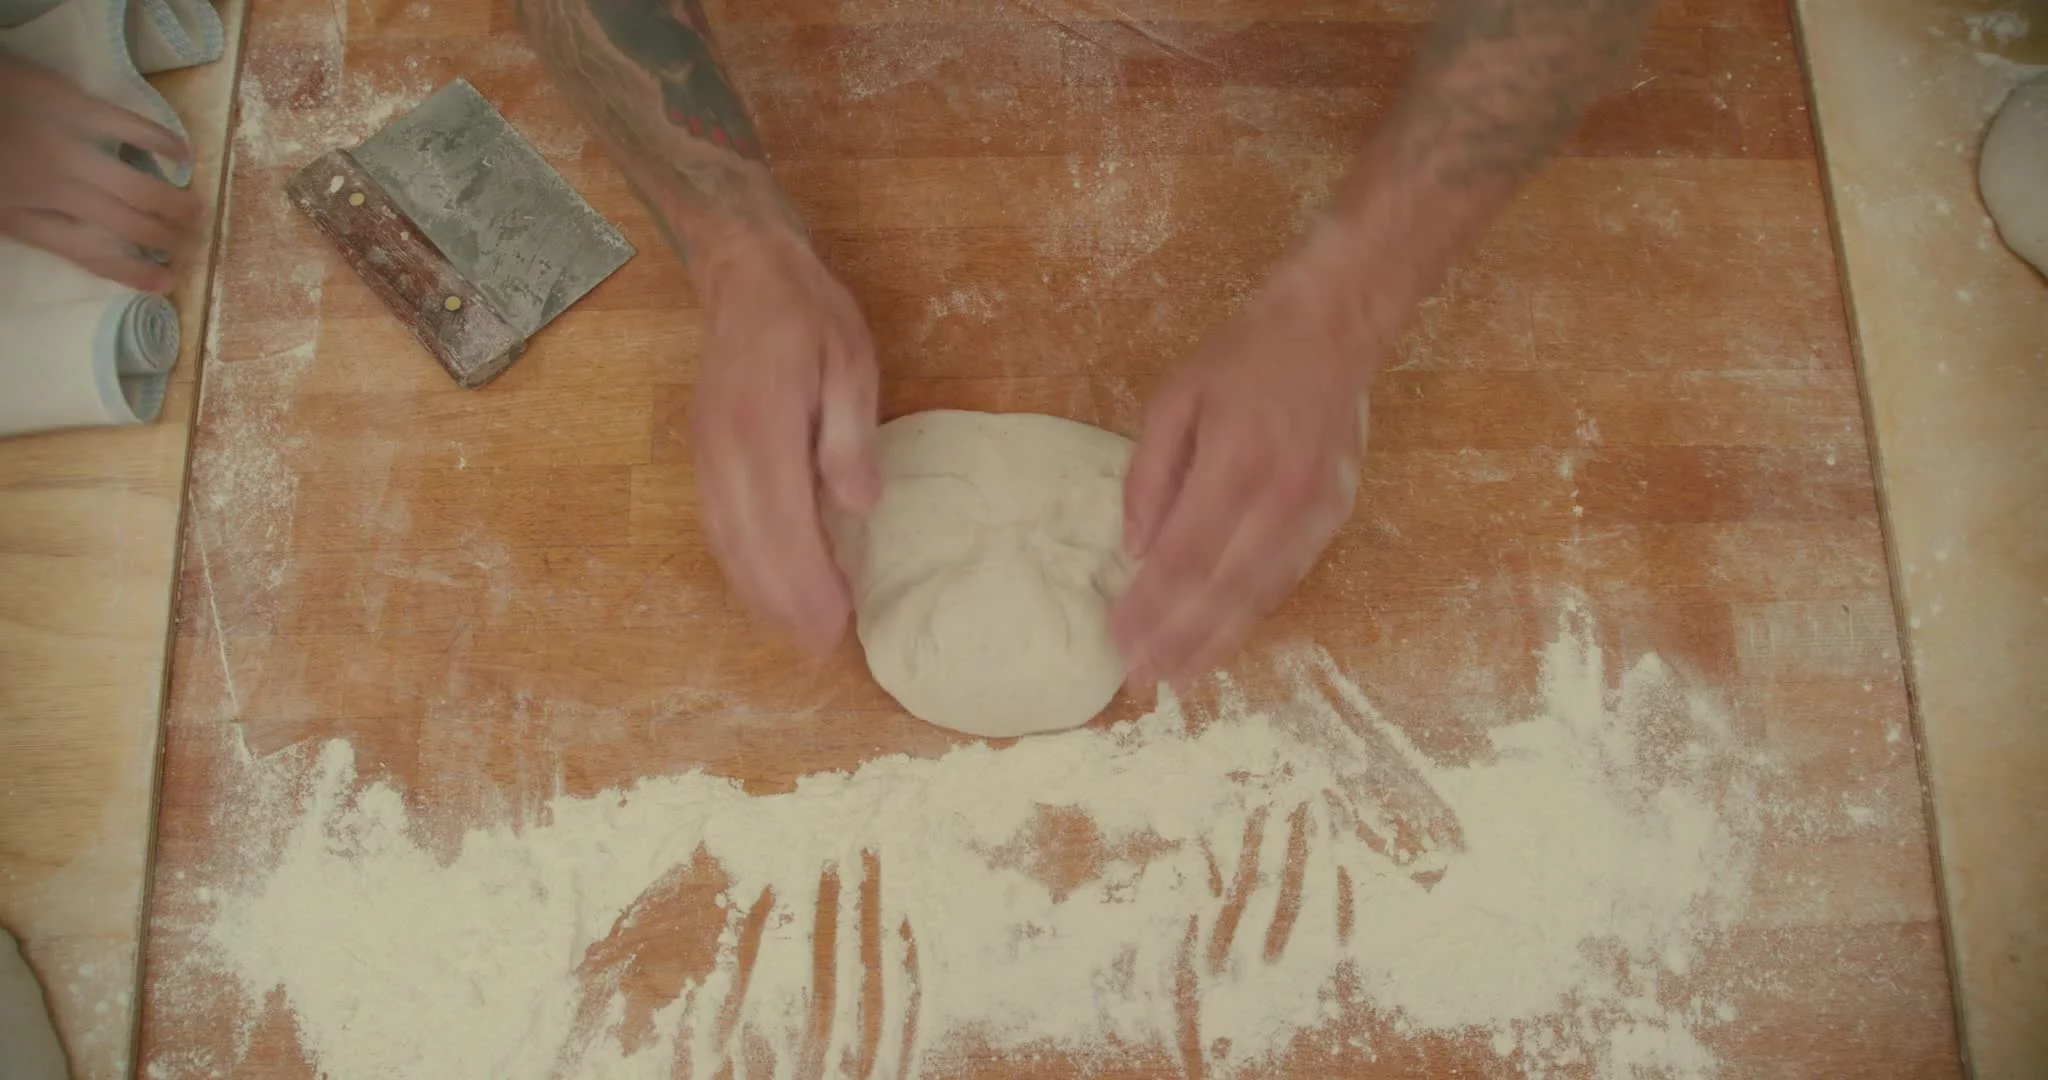
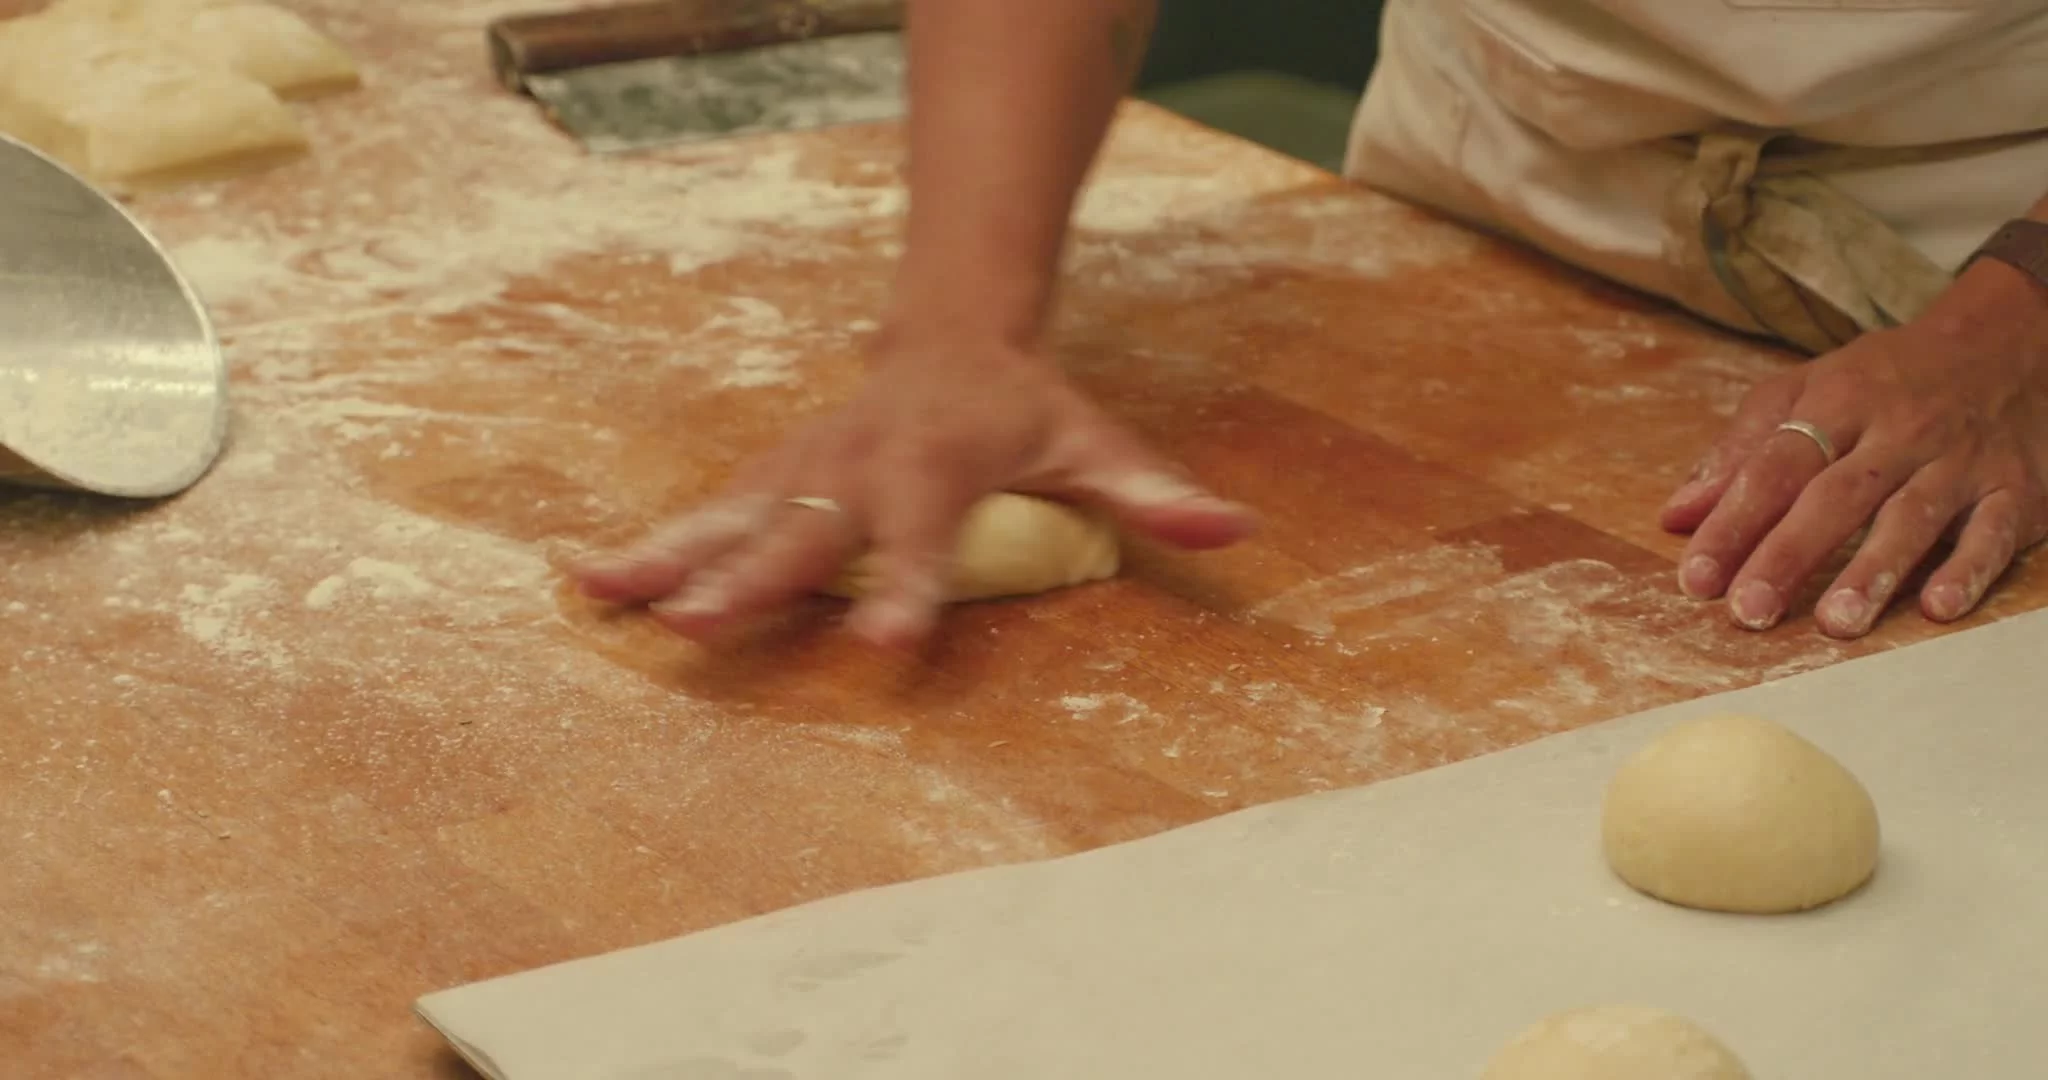
Milk Bun Master Recipe - Divide, Shape, and Proof the Dough
Cut the dough into 10 portions of 80g each. Roll each piece into a ball using the dough balling technique: Flour your dominant hand and tap off the excess. Get one portion of dough in front of you and apply light pressure to the top of the dough as you use your fingers and thumb to form a kind of circular basket around the dough.
Roll it in circles; the dough should be a bit sticky on the bottom as you’re pressing lightly on it while rolling; that friction and sticking on the work surface will help the dough come together in a ball. As you roll the dough, your fingers should be tucking the dough underneath itself to help form a ball. Roll until the dough has a nice, taut surface and a round shape. Repeat with the remaining dough pieces.
Space them evenly with ample room between them on a sheet pan lined with parchment paper or a silicone bakng mat. Let the buns proof in a warm place (75°–85°F / 23°–29°C) for at least 2 hours and up to 4 hours, until they have doubled in size and do not spring back when you poke a finger into the side of a bun.
-
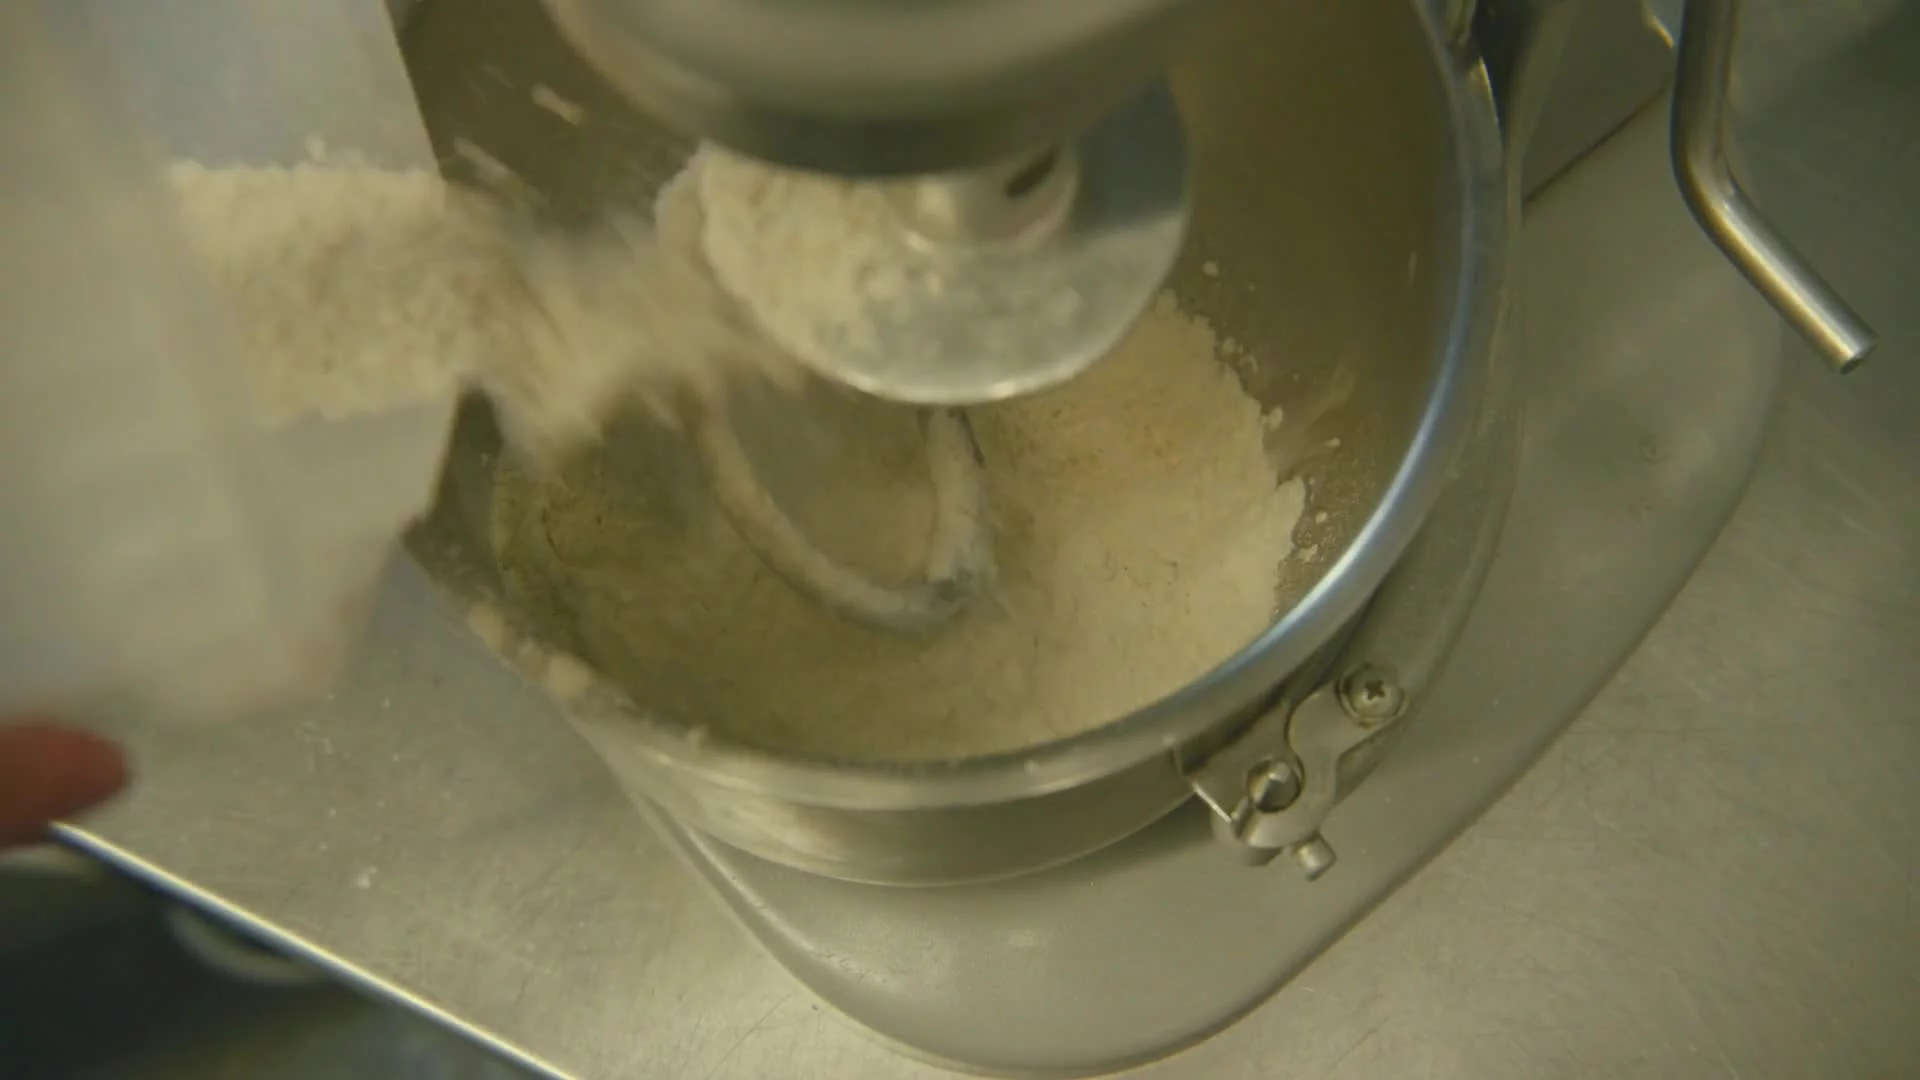
Classic Panettone - First Dough - Mix the Dough
In a stand mixer fitted with the dough hook, combine the flour, water, and Danny and mix on low speed until it just comes together.
Increase the speed to medium, then mix for about 10 minutes. Don’t shortcut this step because you think the dough looks well combined. Test the strength of your dough: give it a light tug. You should encounter really strong resistance, like chewing gum that you’ve chewed all day. If it’s not feeling that strong, mix it more, up to 5 minutes longer, and test it again. The dough does not need to look super smooth before the sugar goes in. It just needs to be very strong.
Add half the sugar and continue to mix on medium speed until the sugar is dissolved and you can no longer feel the sugar crystals when you rub the dough between your fingertips. Add the rest of the sugar and continue to mix until you can again no longer feel the sugar crystals.
Add half the butter and continue to mix until it is almost incorporated. Then add the remaining butter and continue to mix until it is completely incorporated, meaning you can’t see or feel any lumps of butter in the dough.
Decrease the mixer speed to low to avoid splashing and add half the yolks. Once they have begun to mix in, increase the speed to medium and mix until the yolks are incorporated. Decrease the speed to low again, add the rest of the yolks, and continue to mix until the dough is completely smooth and homogenous.
The dough should take about 30 minutes total to mix.
-
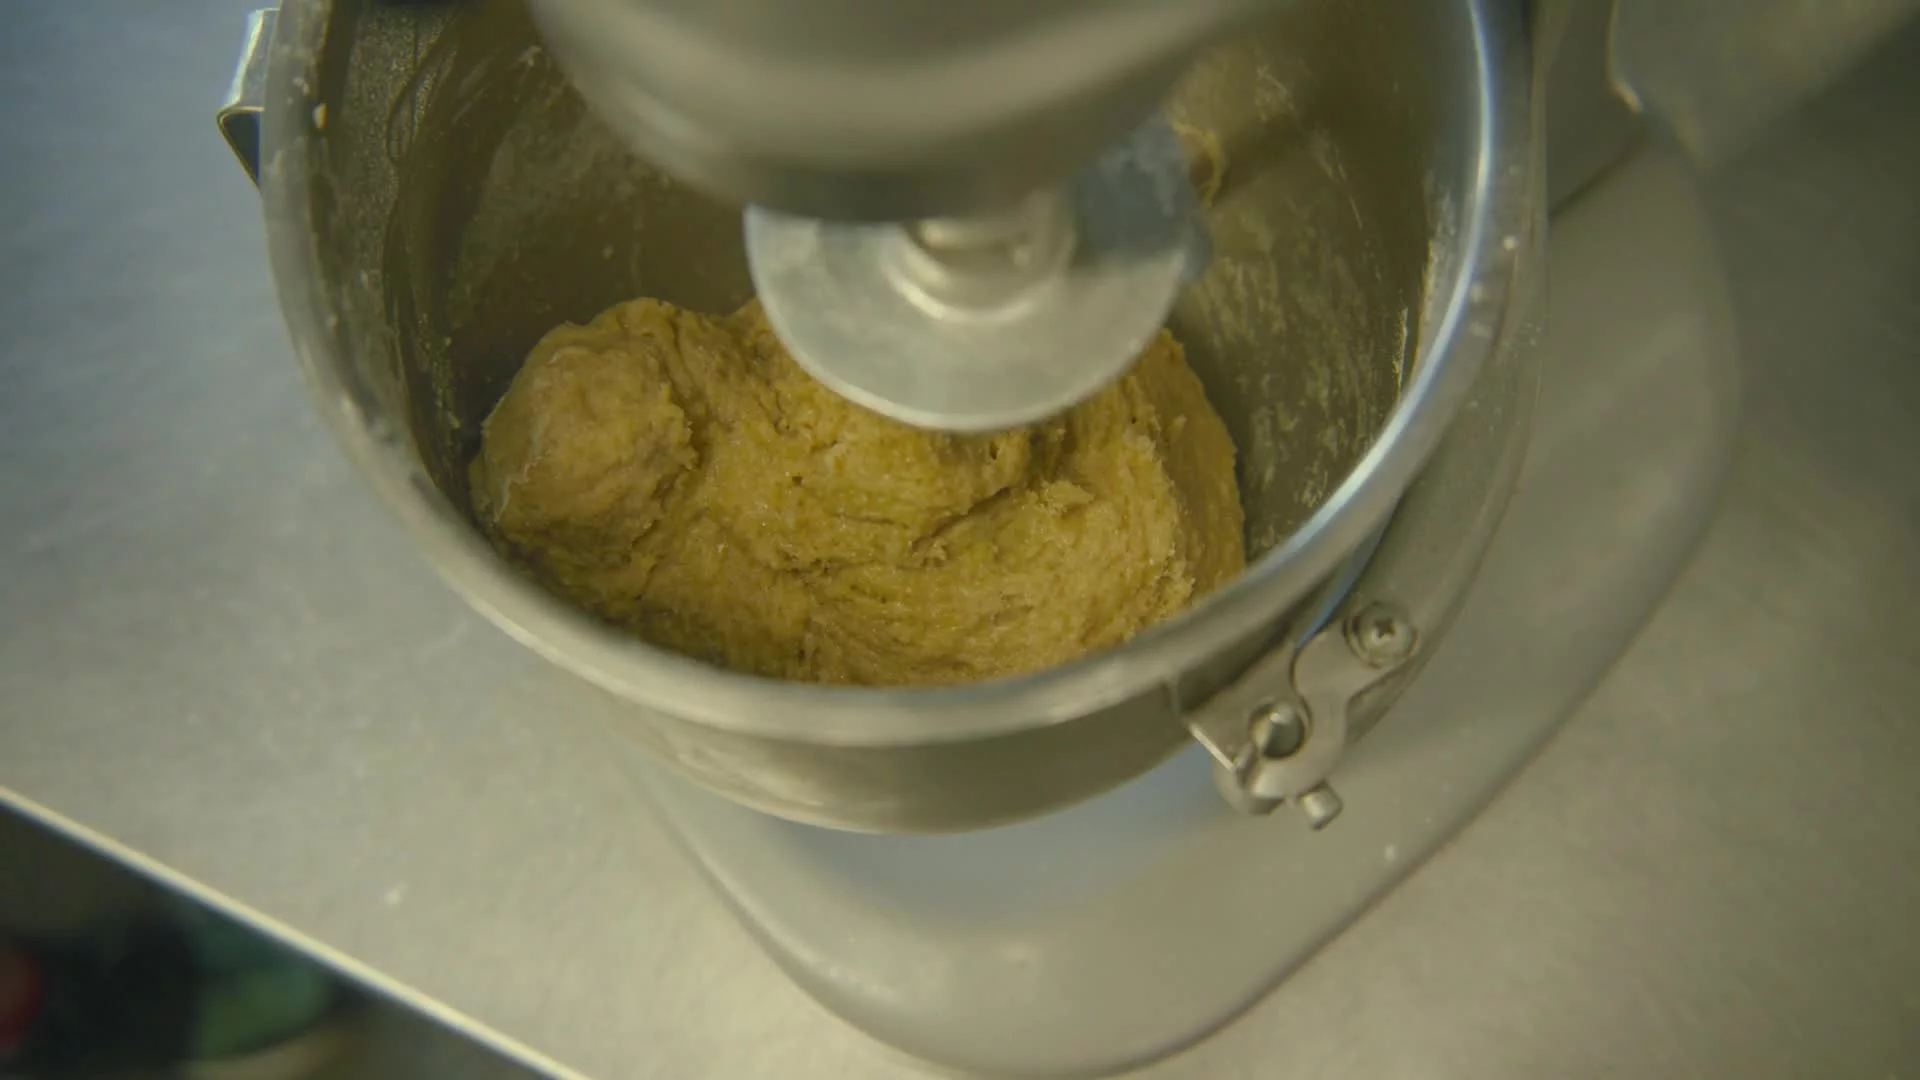
Classic Panettone - Second Dough - Mix the Dough
In a stand mixer fitted with the dough hook, combine the first dough and flour and mix on low speed until the mixture just comes together. Increase the speed to medium-high and continue to mix until the dough is strong and smooth, 10 to 15 minutes. You should see and hear the dough slapping against the inside of the bowl as one cohesive mass.
Test the strength of your dough: give it a light tug. You should encounter really strong resistance from the dough, like chewing gum that you’ve chewed all day. If it’s not feeling that strong, mix it more, up to 5 minutes longer, and test it again.
This is when the fear sets in, but you’ve come this far, and you’ve got to persevere. You’re strong, and your dough is now at its strongest point, before you start adding sugar, eggs, and butter. The friction from the mechanical mixing and the heat of the mixer’s motor will start to heat the dough up a bit, but don’t freak out — you’re about to add a lot of cold ingredients.
So add half the sugar and all the salt and continue to mix on medium until the sugar and salt have dissolved and you can no longer feel the crystals when you rub the dough between your fingertips, up to 5 minutes. Add the remaining sugar and continue to mix until you can again no longer feel the sugar crystals, up to another 5 minutes.
Add half the butter, mixing until it has been incorporated and you can no longer see or feel visible butter lumps. Decrease the speed to low to avoid splashing and add half the yolks. Once they have begun to incorporate, increase the speed to medium and mix until they are fully incorporated. Next, add the remaining butter, the citrus paste, zest, and juice and continue to mix until they have been completely incorporated.
Decrease the speed to low again to avoid splashing, add the rest of the yolks, then increase the speed again and continue to mix until they are fully incorporated, up to another 5 minutes. Finally, add the raisins and candied orange and mix on low speed for about 2 minutes, until all the additions are well distributed.
After you’ve added the fruit, the dough won’t feel as strong as it did before: don’t panic. It should be smooth, homogenous, and have some resistance when you tug on it gently.
At this point, the dough is finished. It should look and feel like a wet bread dough.
-
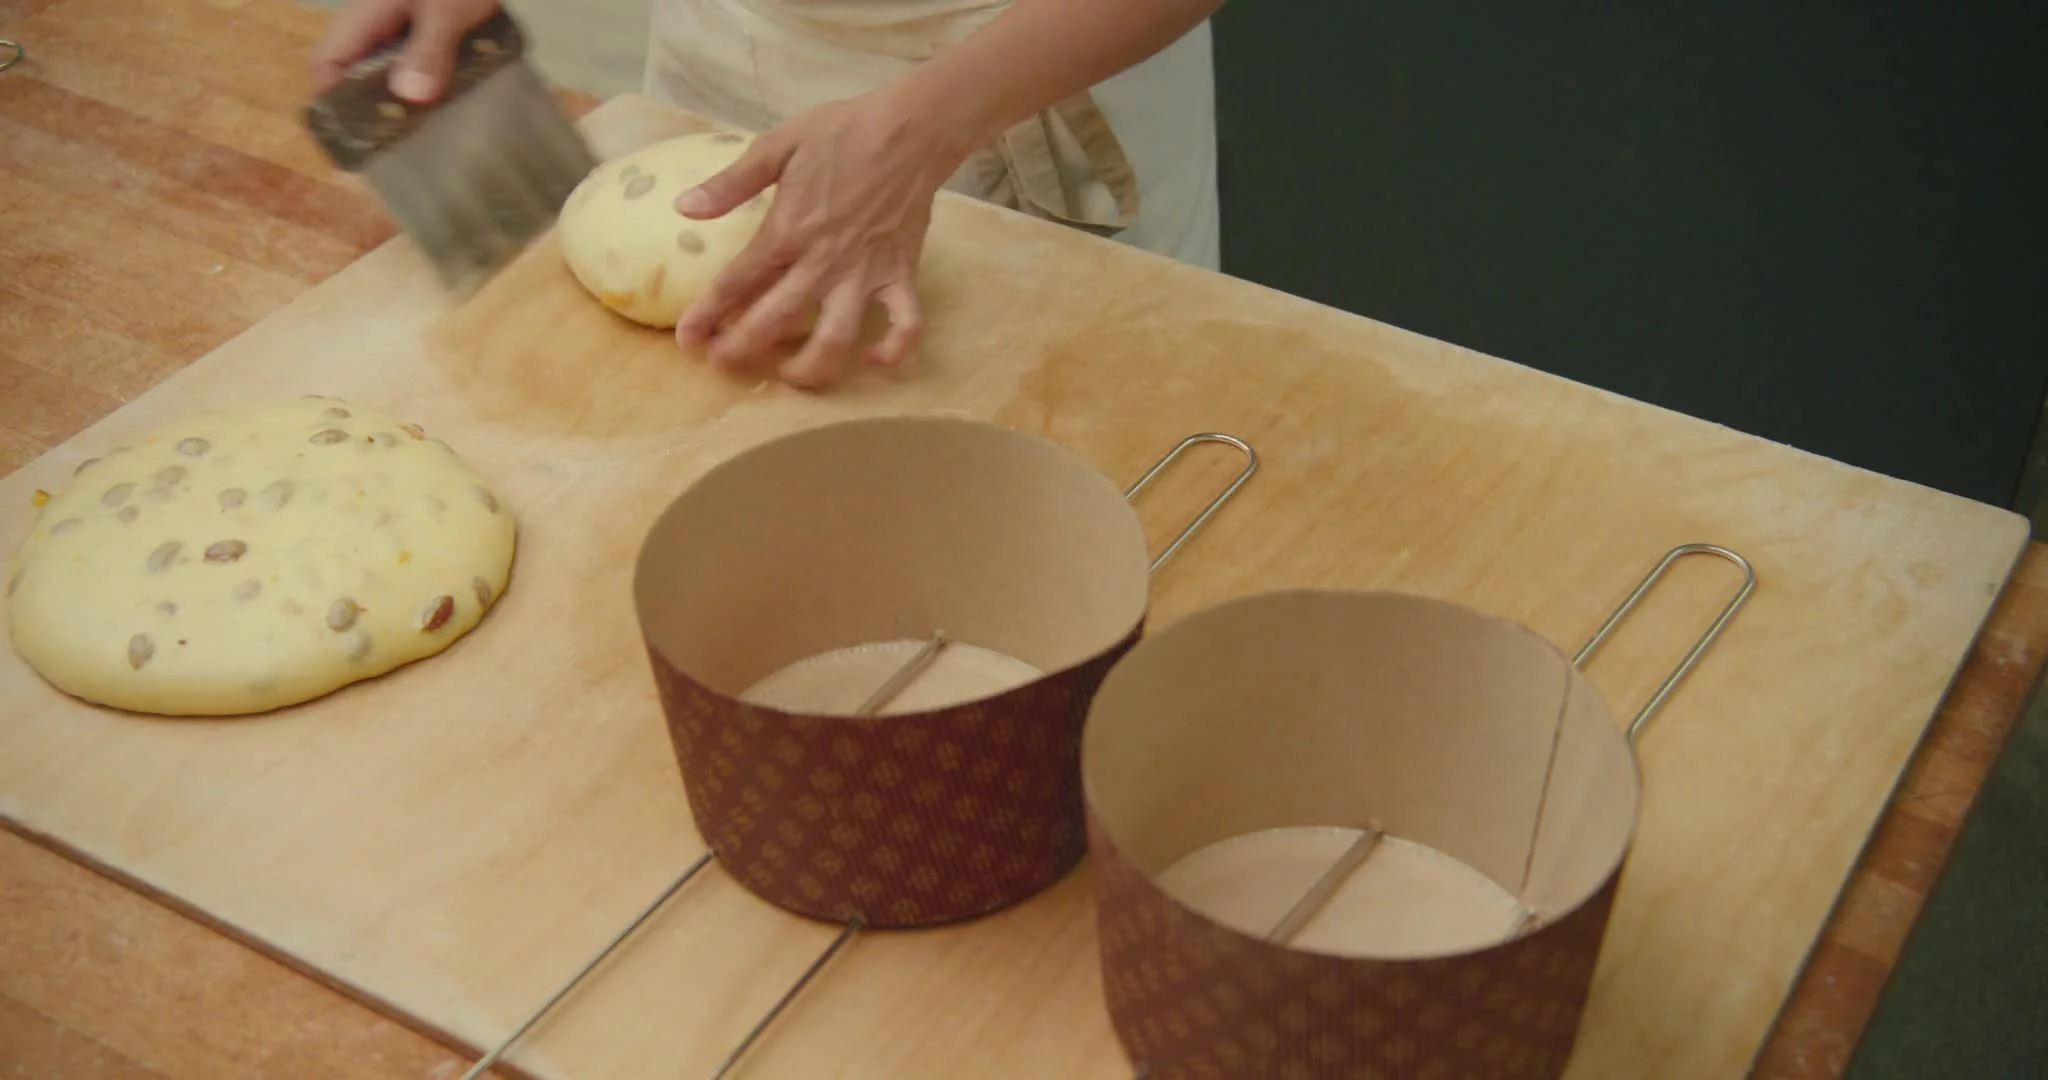
Classic Panettone - Preshape and Rest the Dough
Transfer the dough to a clean work surface and preshape it into a round. Let the preshaped dough rest uncovered for 1 hour, until it has relaxed and formed a skin.
-
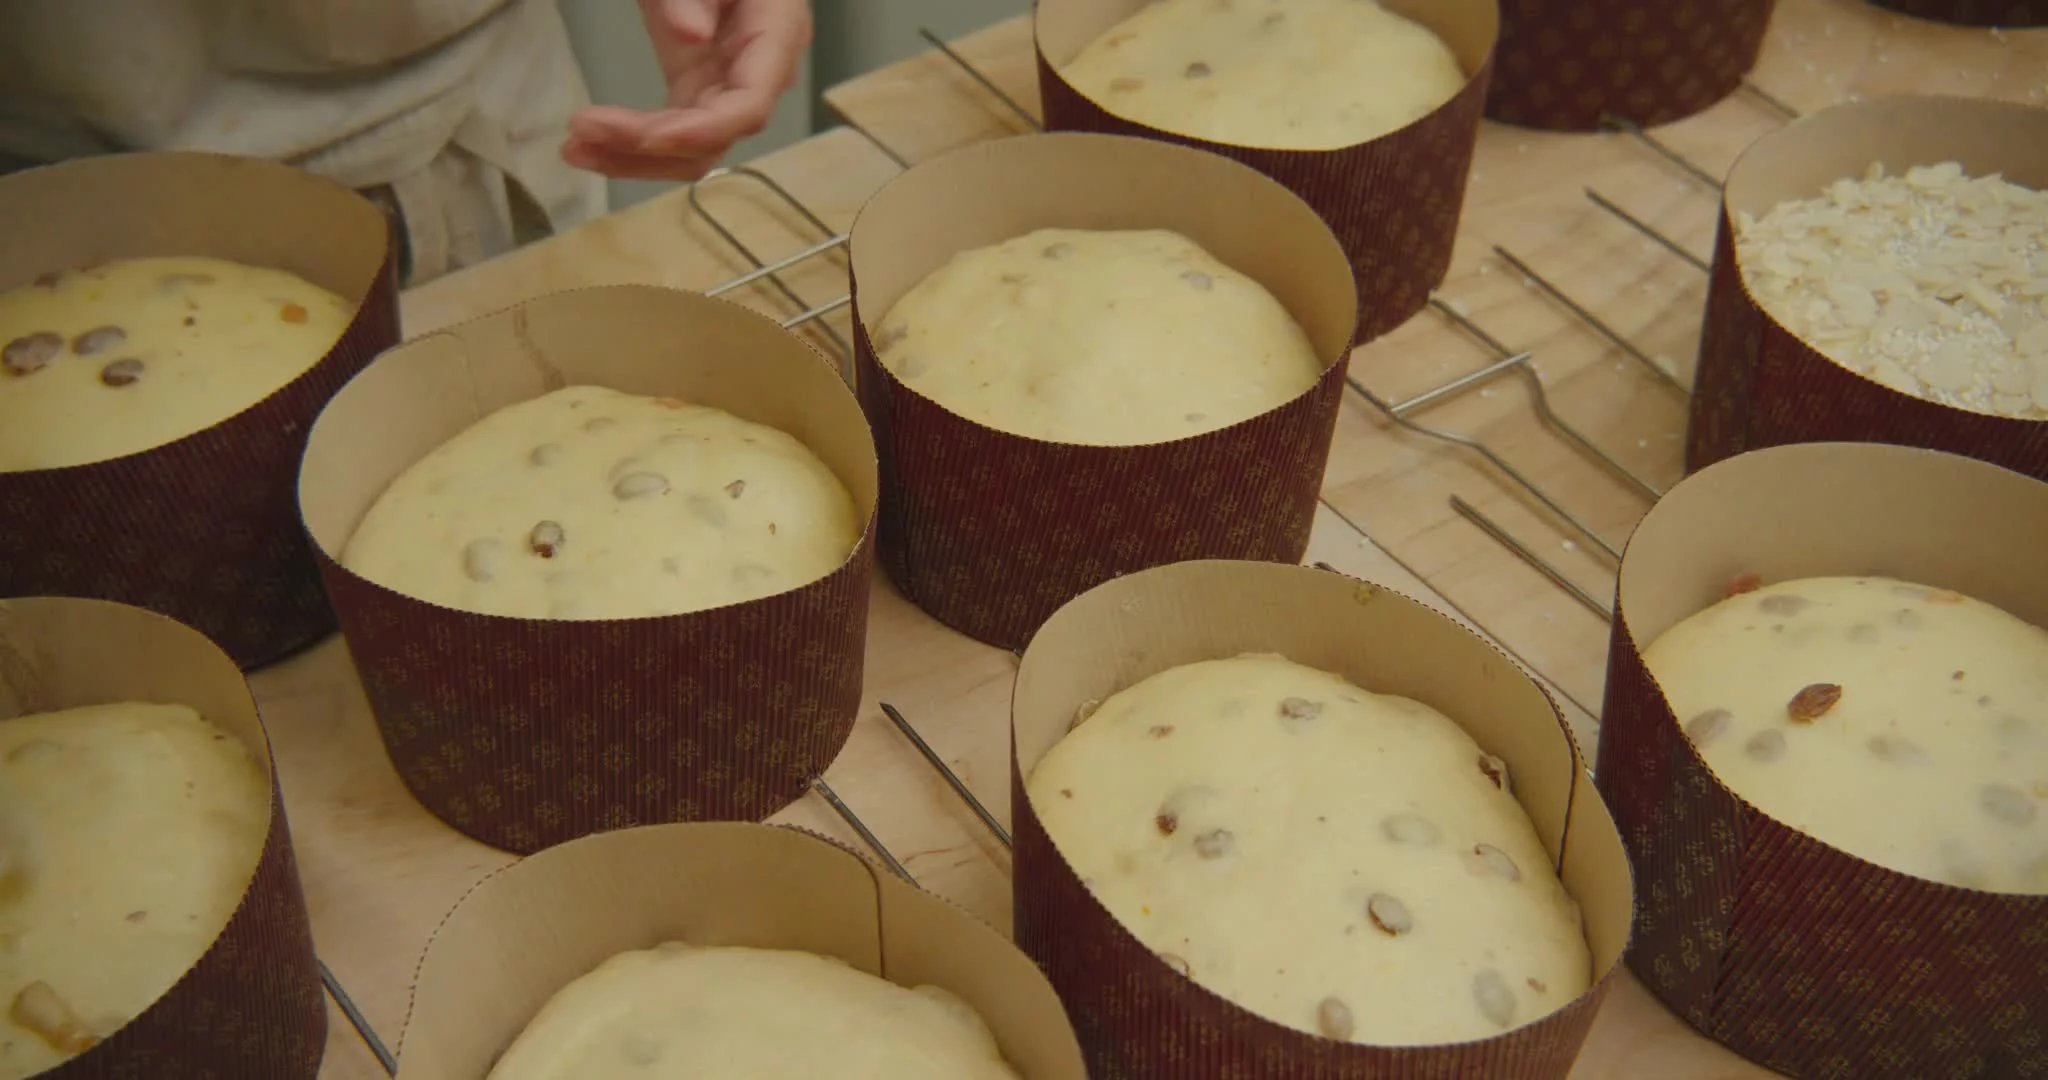
Classic Panettone - Final Shape
Skewer the panettone mold with 2 parallel wooden skewers, about 3 inches apart, as close to the base of the mold as possible. Give the dough a final shape into a round and gently transfer it, seam side down, to the panettone mold.
-
Classic Panettone - The Topping
While the oven preheats, mix the ingredients for the topping: In a medium to large bowl, whisk together all the top- ping ingredients until they are well combined. Spoon the mixture over the top of the panettone and use a spatula or pallet knife to gently distribute it over the top.
Don’t worry if some of the mixture drips down the sides. I like to sprinkle the top with pearled sugar and sliced almonds, so if you like, do that, too.